How To Use Blueprints
In this article you will know how to add automation blueprints to your Home Assistant and configure it.
Blueprint Automations
Some blueprints are already installed. Automations based on such blueprints only need to be configured. In web interface you can find pre-installed blueprints in Settings/Automations & Scenes. Open Blueprints and find the blueprint you want to use. In this example Motion-activated Light will be used.
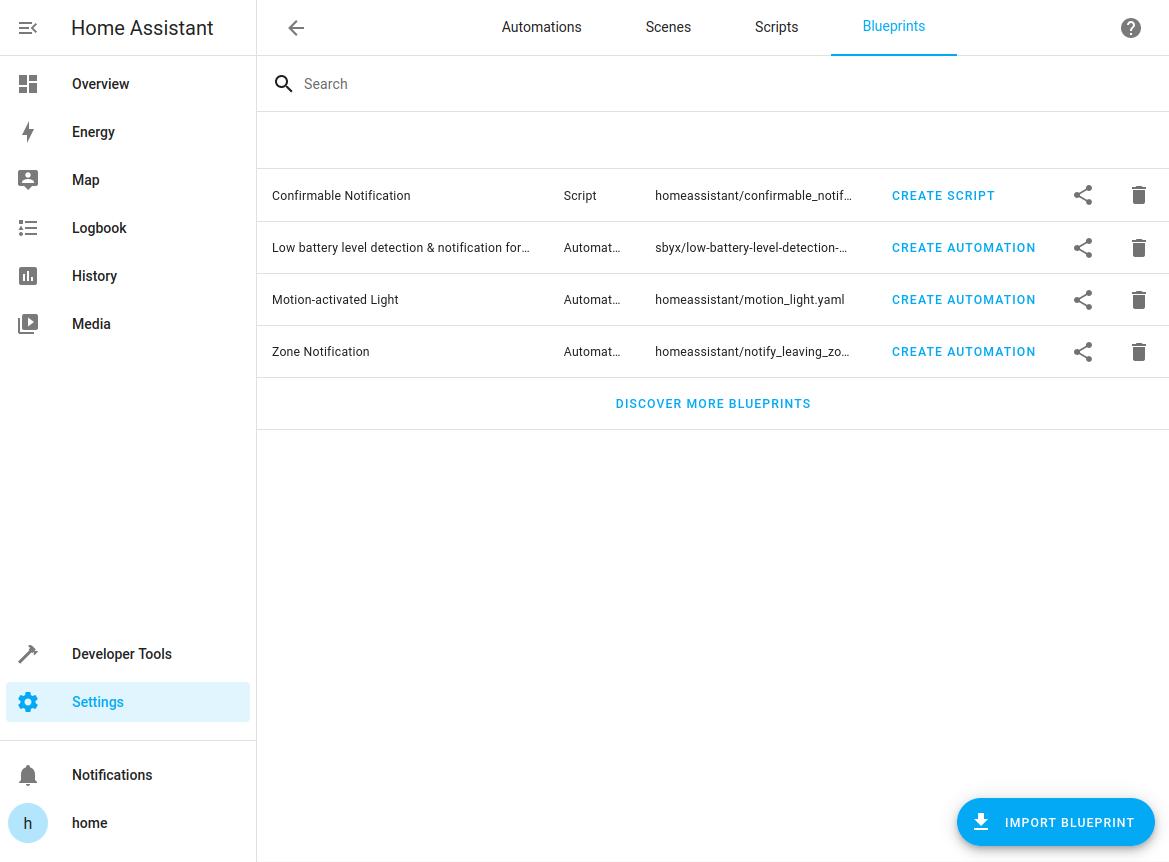
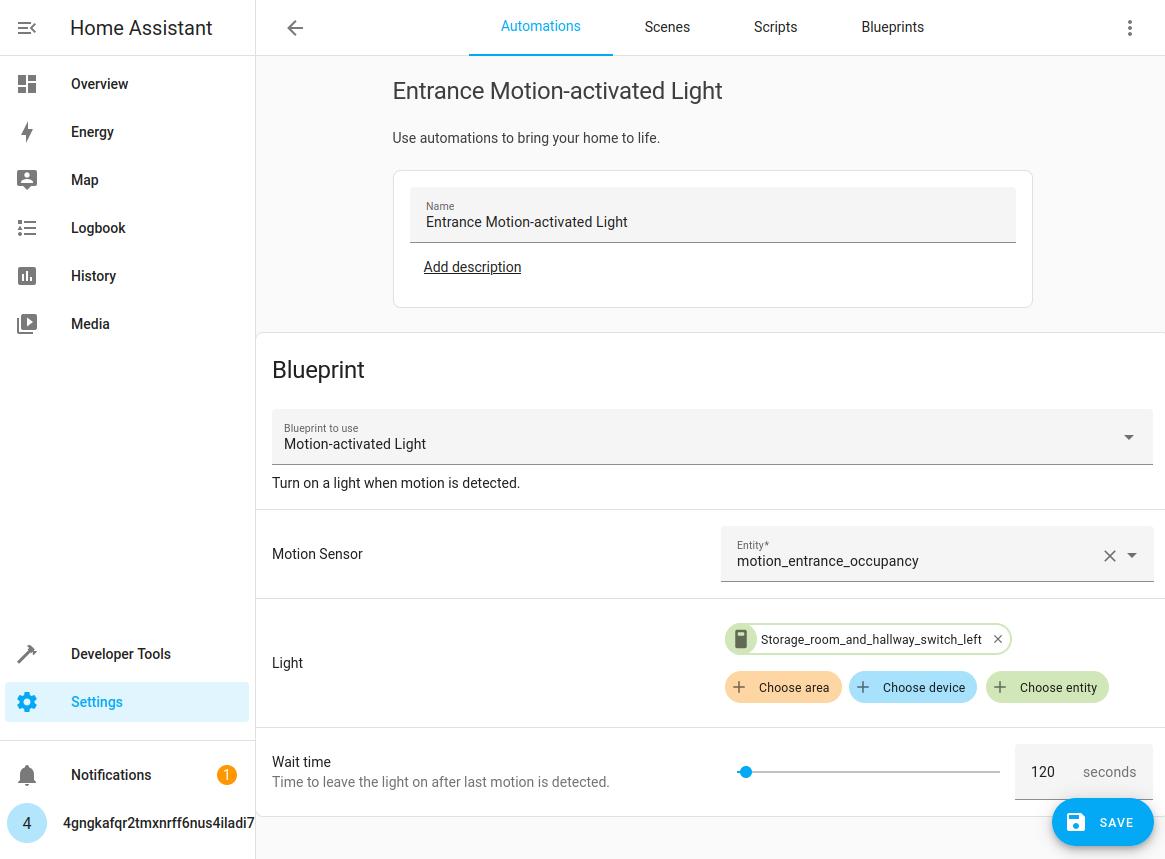
Click on Create Automation to open the automation editor. Give a name, choose a blueprint to use (Motion-activated Light in our case). After that you need to choose motion sensor and lamp. When configuration is finished, click Save.
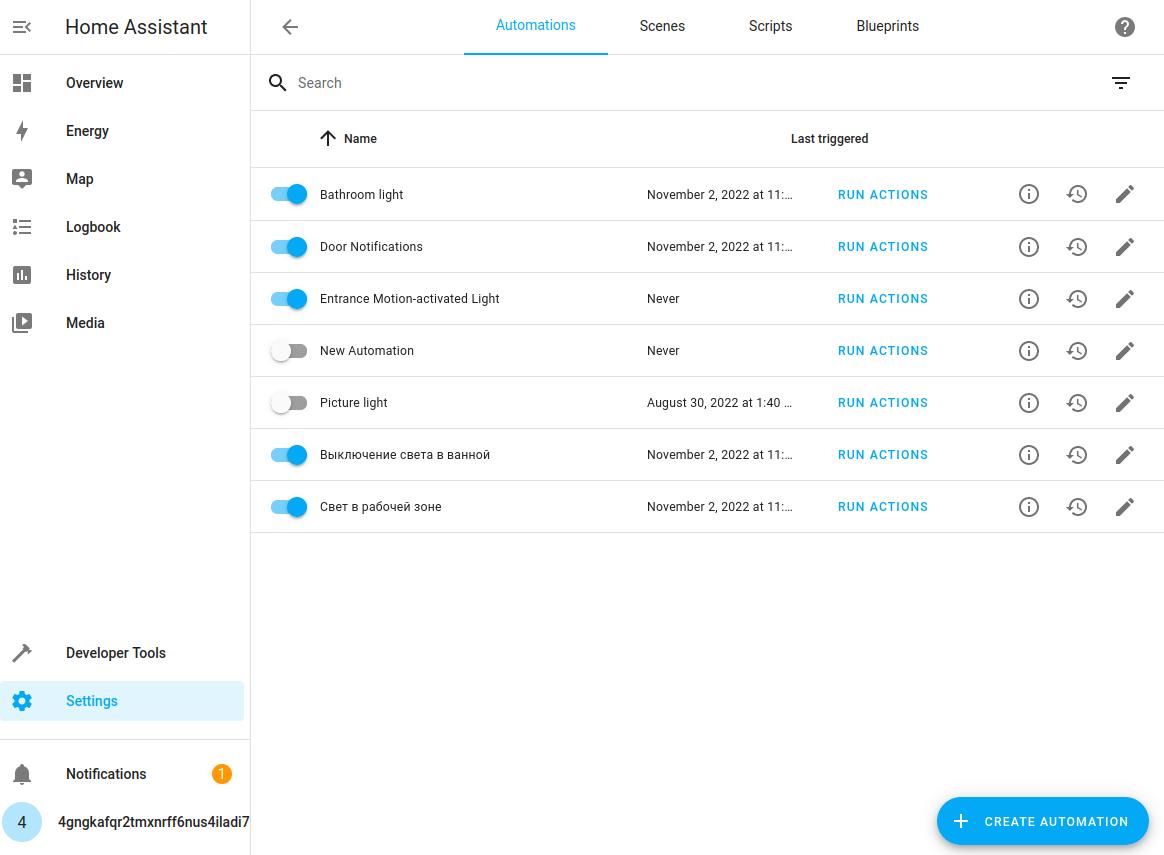
If you want to make changes, you can find it by going to Settings/Automations & Scenes and then Automations.
Importing Blueprints
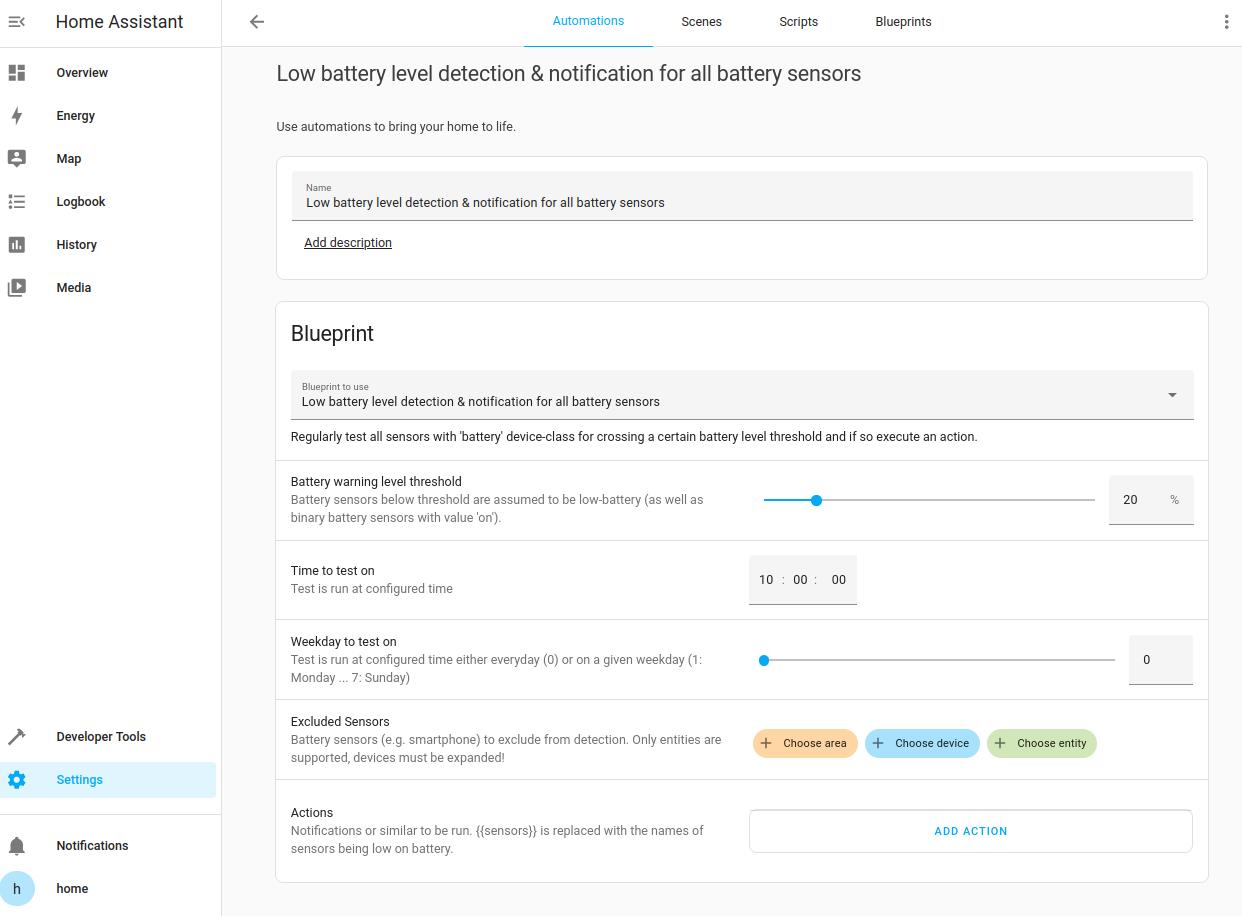
Home Assistant can import blueprints from the Home Assistant forums, GitHub and GitHub gists. List of all Blueprints are located on Blueprints Exchange. After you chose, go to Settings/Automations & Scenes and open Blueprints. Click on Import Blueprint and insert URL of the chosen blueprint. Then click on PREVIEW BLUEPRINT. In this case we will use Low battery level detection & notification for all battery sensors.
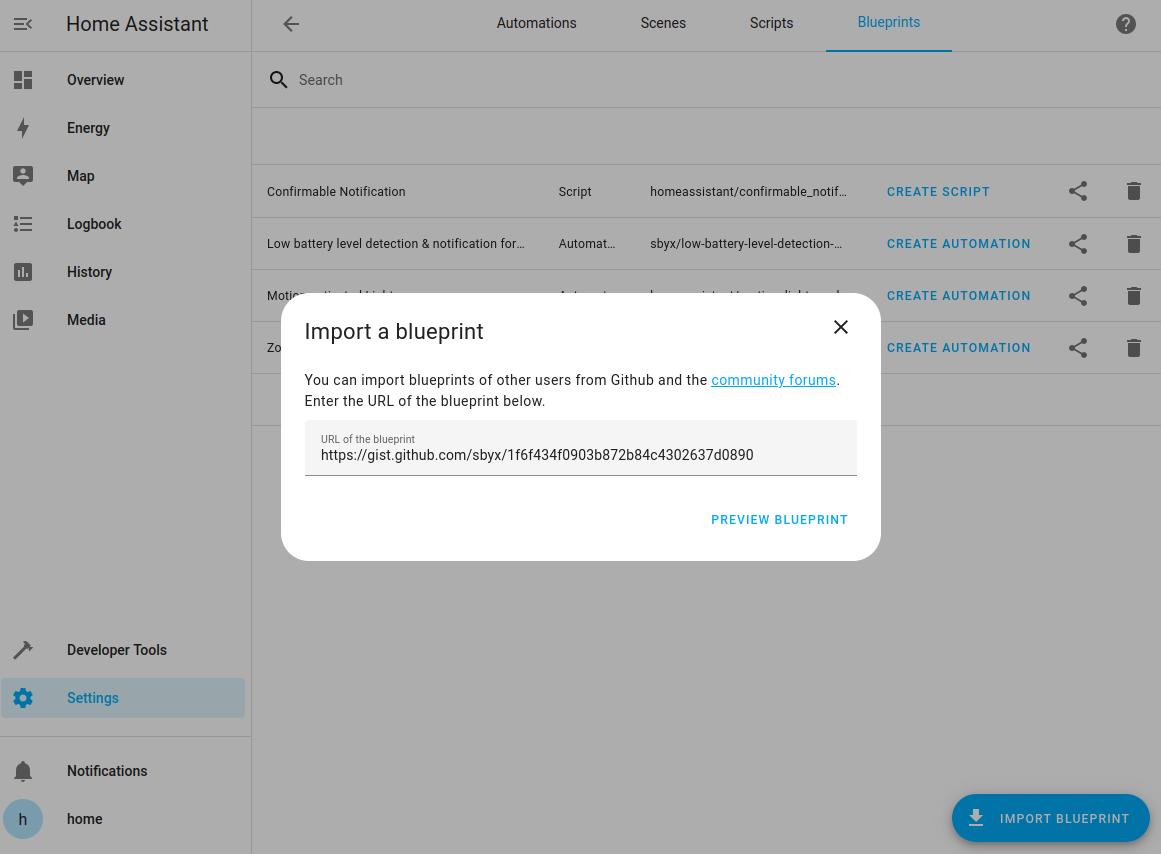
This will load the blueprint and show a preview in the import dialog. You can change the name and finish the import. Click on Create Automation to open the automation editor. Here you can configure automation’s parameters and add actions to get notifications.
Couldn't complete
It was hard
It was ok
It was easy
Make a contribution
Robonomics wiki is open source. See something that's wrong or unclear? Submit a pull request.
