Robonomics Video Service
This article shows how to add an IP camera to Home Assistant and send videos to Robonomics Web Service.
To connect a camera to Home Assistant, you need to know its IP address and create a local camera account to connect to the RTSP stream.
Requirements:
IP camera
Configured local camera account
IP address of the camera
Configured Home Assistant
This article assumes that you have a general IP camera without RTZ (rotate, tilt, zoom) options. If you have an RTZ camera, check “RTZ camera” article. And then come back to a second step here.
Connect the Camera
First, you need to find out the URL for the RTSP stream of the camera.
To do so, try entering the following query on the Internet: “<CAMERA_NAME> RTSP stream”.
Stream URL must start with rtsp://<IP_Address>....
This article uses a “Tapo” camera and the stream path is rtsp://<IP_Address>/stream1.
Open Home Assistant and go to “Settings”-> “Devices & Services”. Press the “ADD INTEGRATION” button and
start typing “Generic Camera” integration. Choose it.
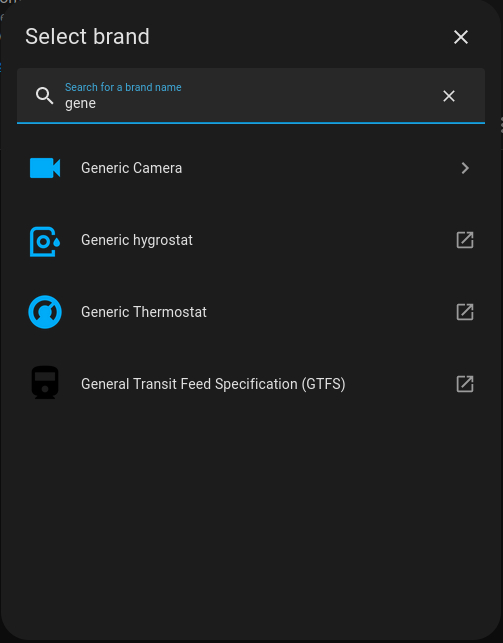
In the configuration window provide the following information:
- Stream Source URL - The URL of camera’s RTSP stream
- Username - write a username of your local camera account
- Password - write a password for your local camera account
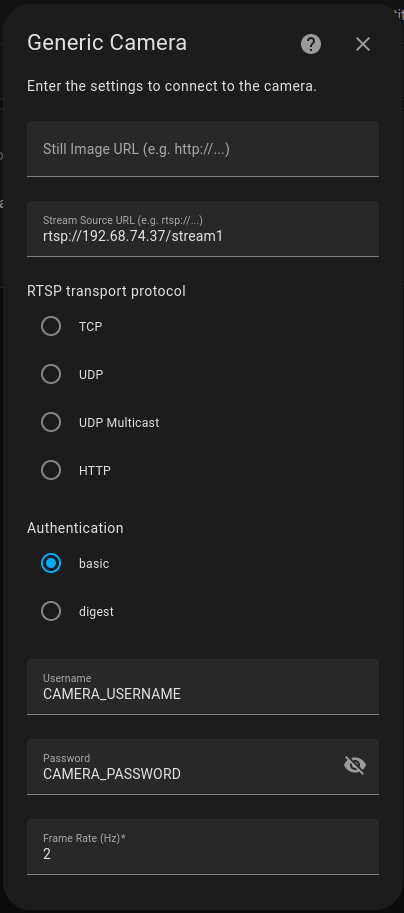
Scroll down the settings and press the “Submit” button.
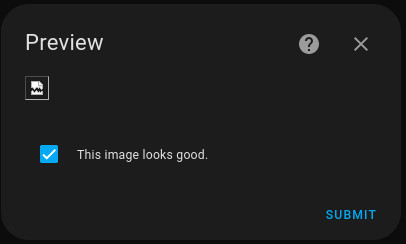
In Preview window activate the checkbox “This image looks good.” and press the “Submit” button. Then - “Finish”.
Add to the Dashboard
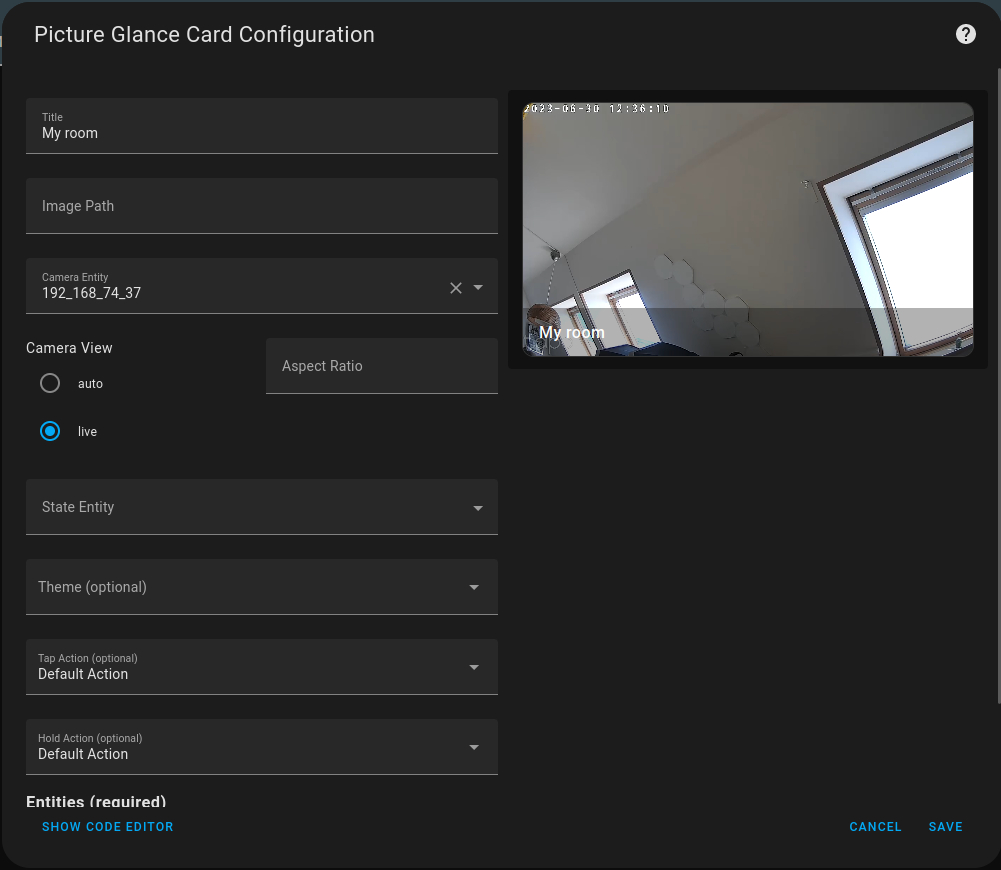
Additionally, you can add the stream to your dashboard. To do this, navigate to the dashboard and create a new card
“Picture Glance”. Further steps:
- enter the “Title” you want
- delete data from “Image Path”
- select the camera in “Camera Entity”
- in the “Camera View”, select “live” so that there is less delay
And save it.
Check media folder
Before being sent to the Robonomics Video Service, the video must be saved in a folder, and Home Assistant must have access to this folder.
The easiest option in this case is to use a media pack, in which the Home Assistant stores all the media.
- If you use HAOS or Pre-installed Image your Home Assistant already has Media folder.
- If you use Home Assistant Core, you should go to
.homeassistantfolder and createmediafolder in it. - If you use Home Assistant Docker, add
-v /PATH_TO_YOUR_MEDIA:/media \line to the Docker command.
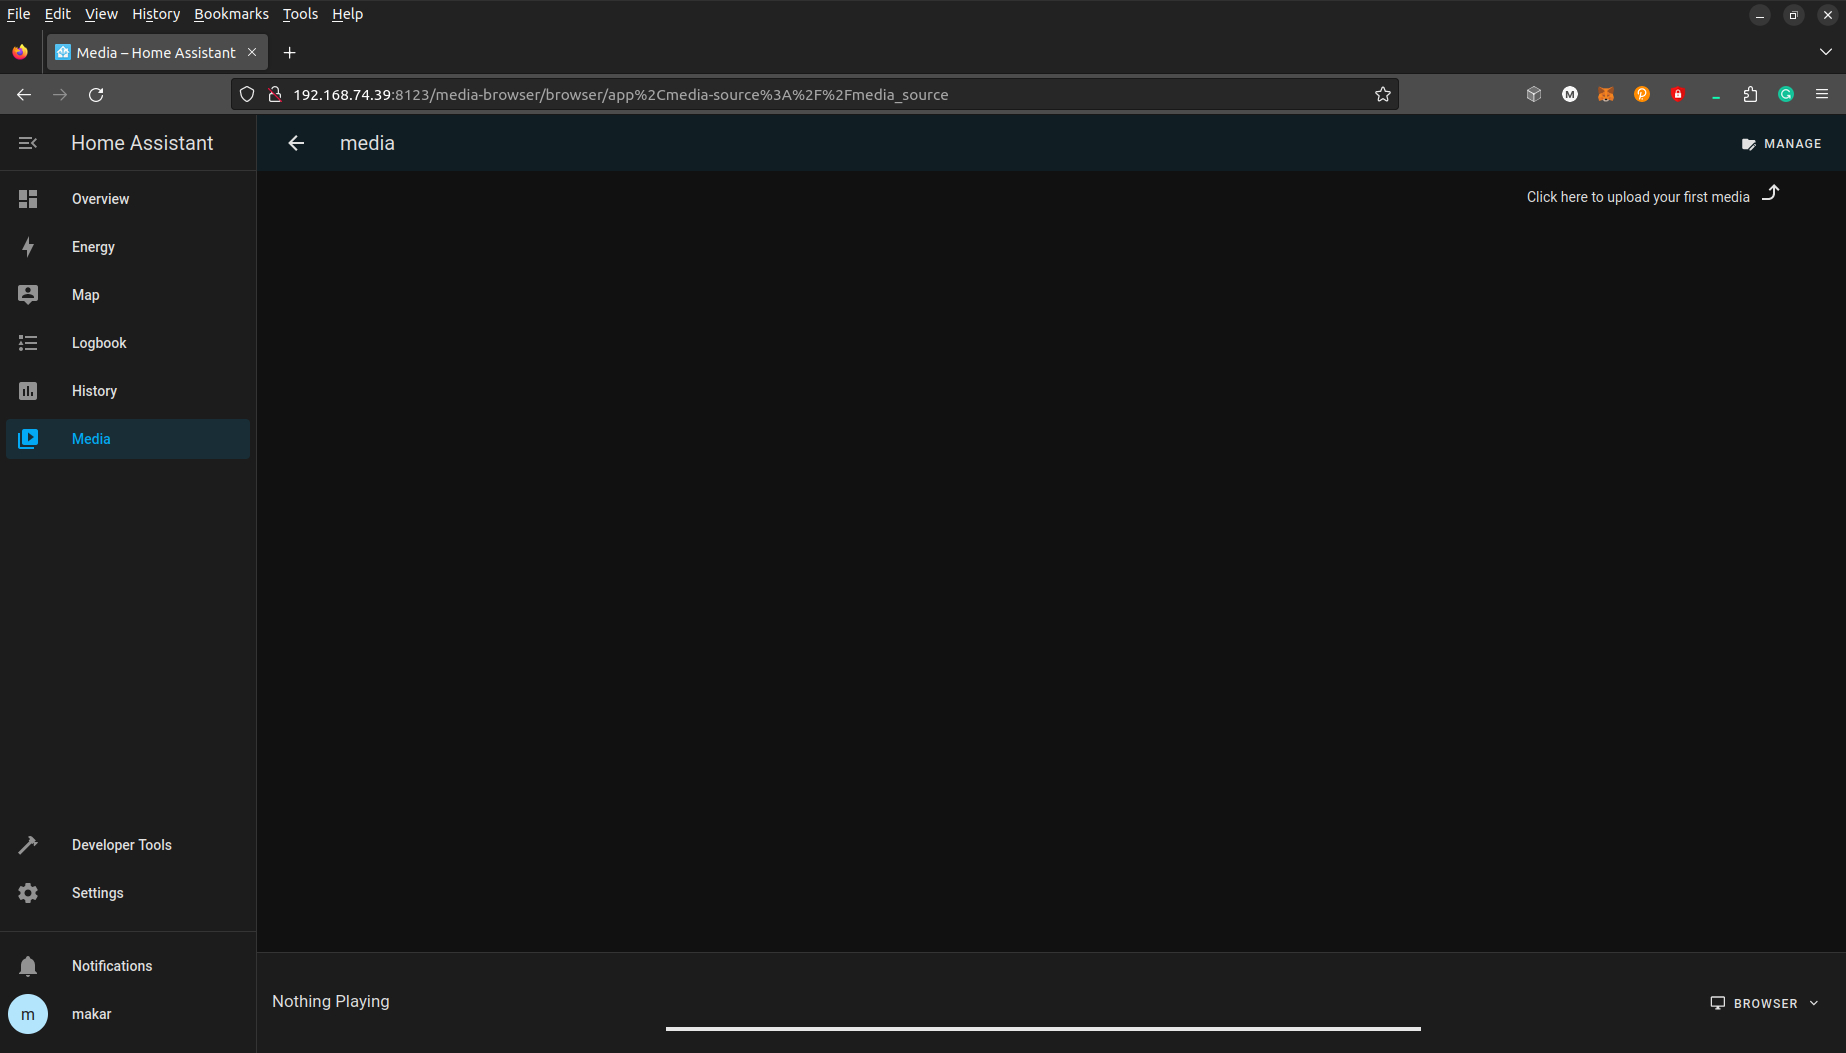
To check that everything was set up correctly, go to the “Media” -> “local media” tab in your Home Assistant.
You should see an empty folder (no errors):
Service Call
To send a video to Robonomics, you should call a dedicated service in Home Assistant.
In this article this is done manually, but you can create an automation for it.
To do this, go to “Developer tools” -> “Services” and find "Robonomics: Save recording to Robonomics ".
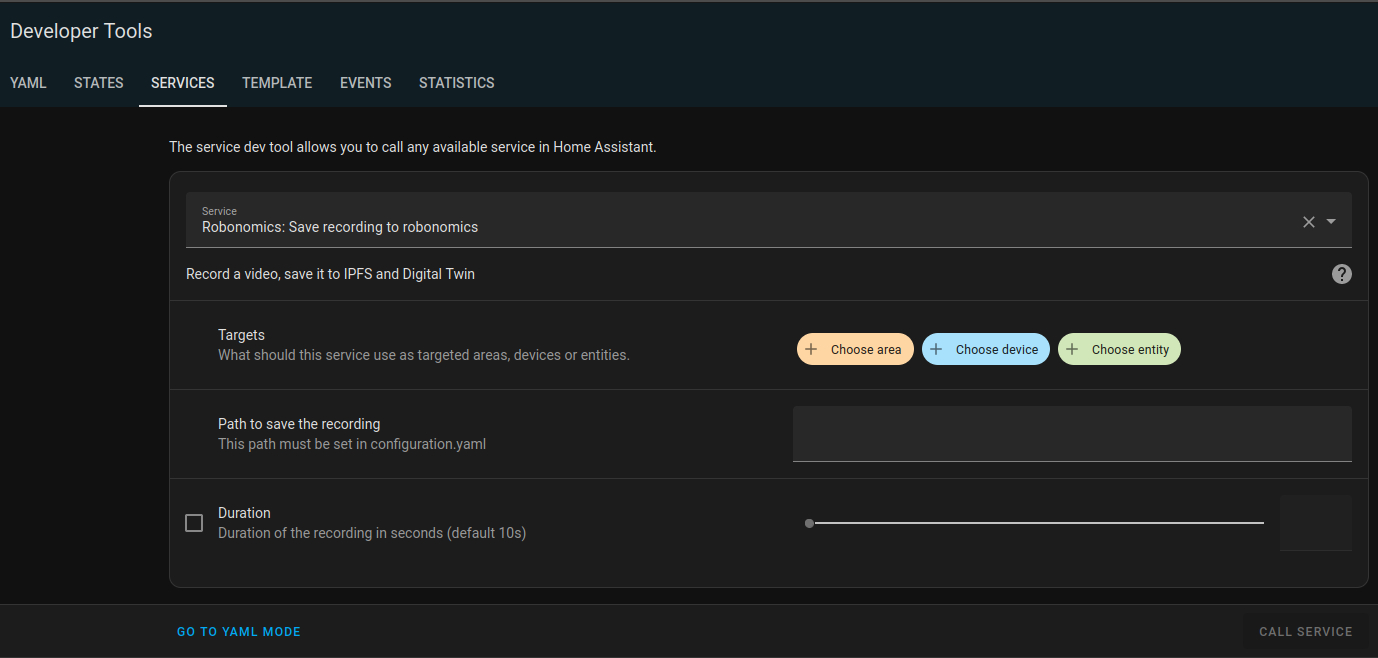
In “Targets” choose your camera entity.
In “Path to save the recording” you should provide an absolute path to the folder,
where Home Assistant can save the video:
- For Pre-installed image -
/home/homeassistant/.homeassistant/media; - For HA OS or Home Assistant Docker-
/media; - For Home Assistant Core - Path to previously created media folder.
Additionally, you can choose the recording Duration.
Fill in the data and call the service with the “CALL SERVICE” button.
DAPP
To view the resulted video go to Robonomics DAPP.
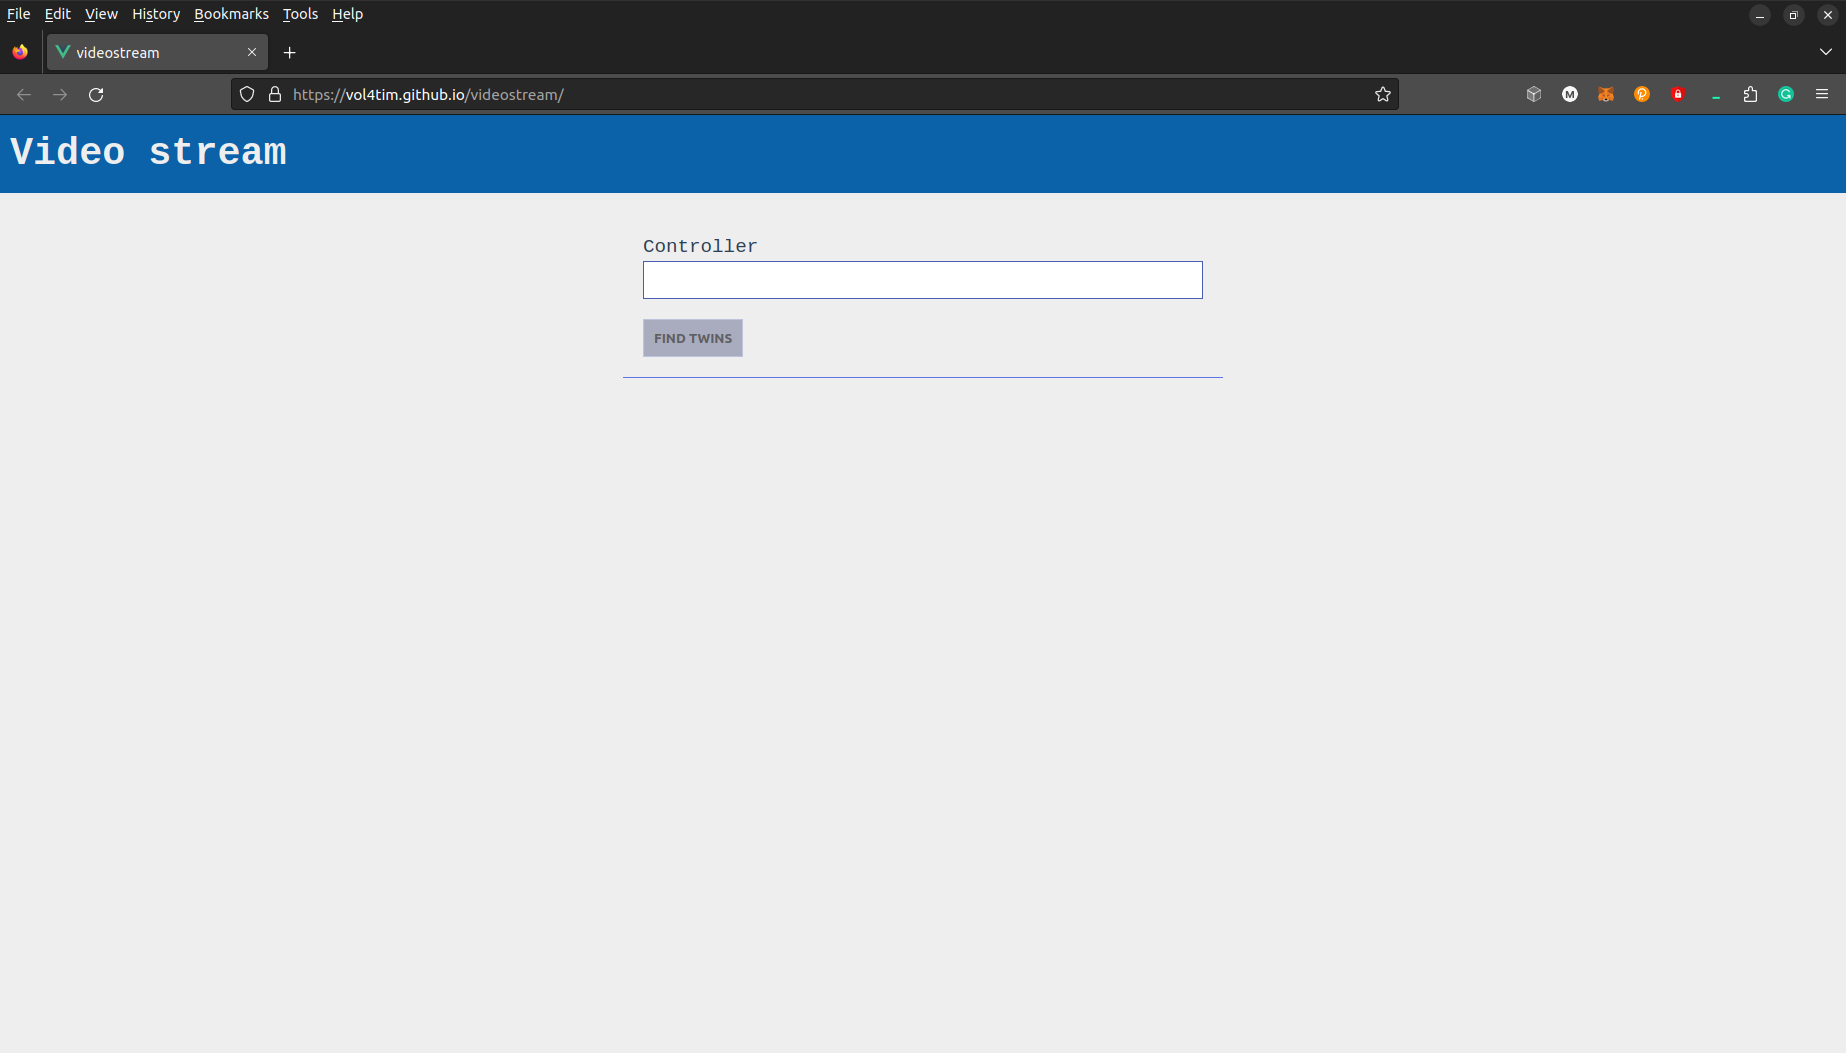
Paste in your controller’s account address and click the button below. Wait for the “Search for Twins” process.
As a result, you will get an IPFS CID with all recorded videos.
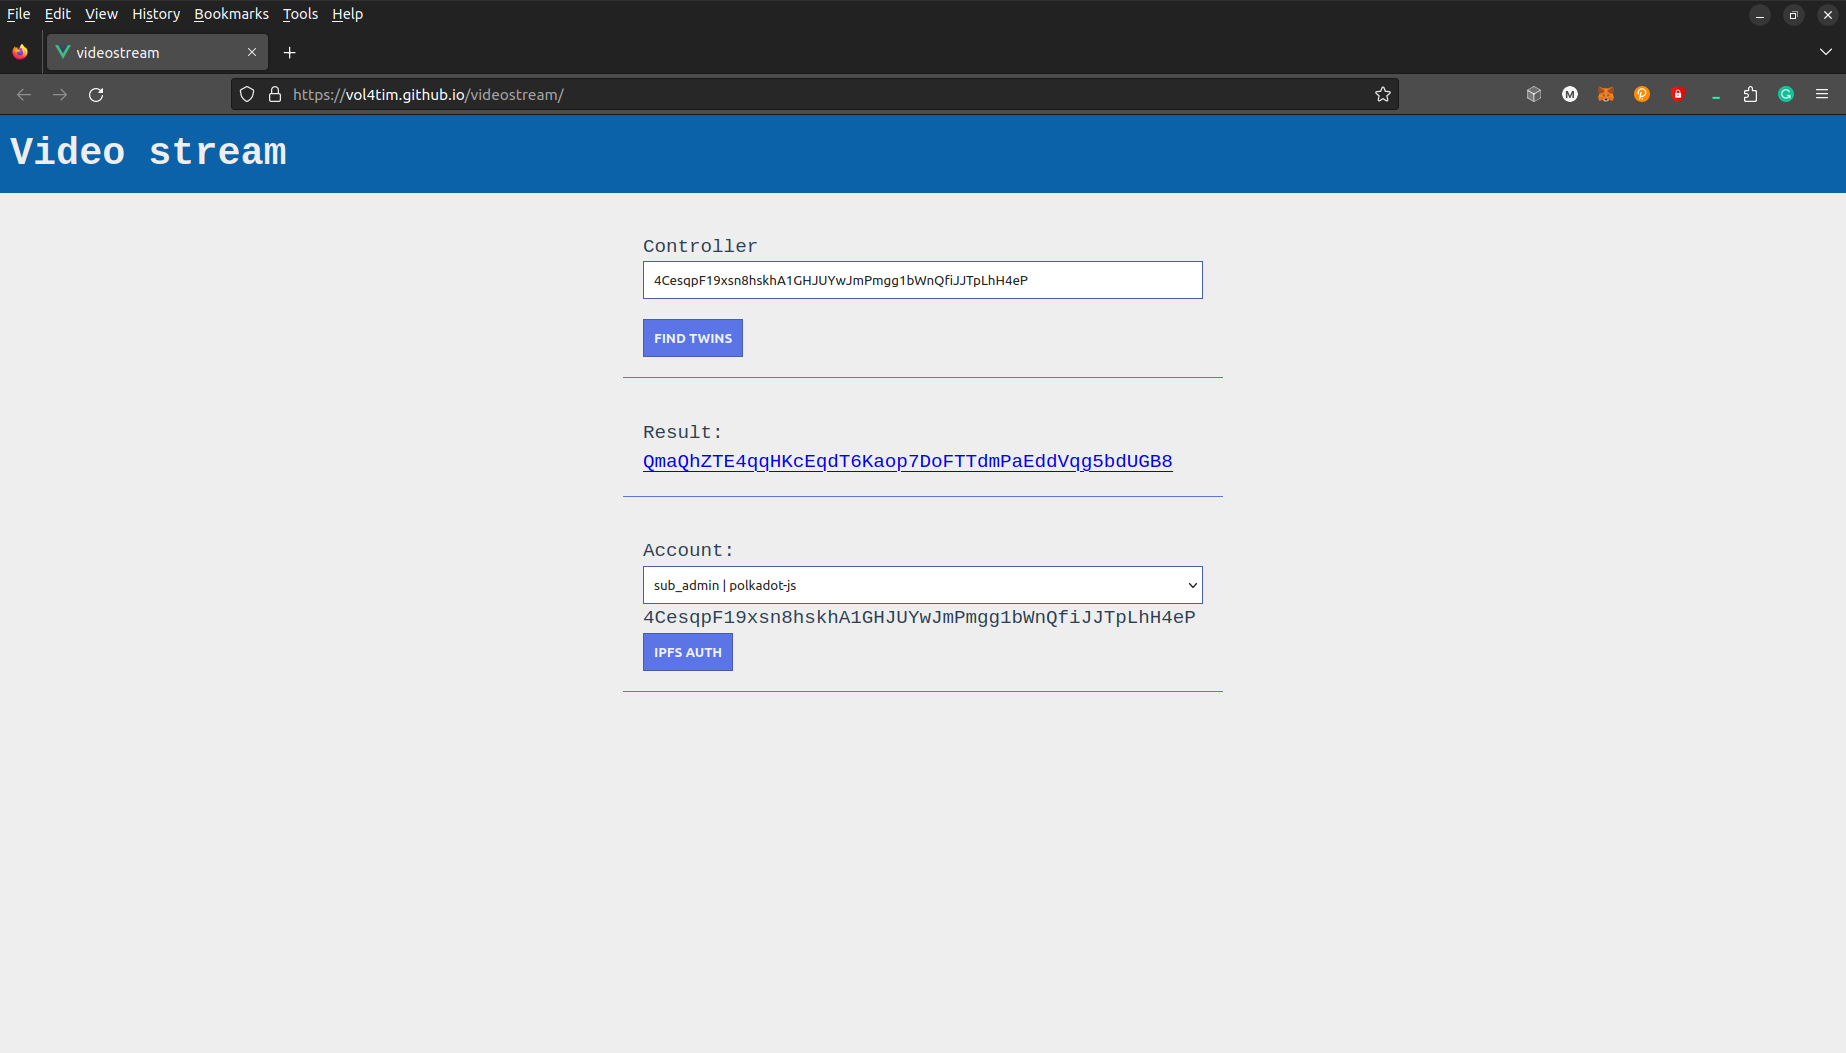
Next, select the controller account (or any other) from the drop-down list and sign a message for authorization in
the Web3 IPFS gateway to download all the videos. As a result, you will obtain all the videos recorded by your smart home.
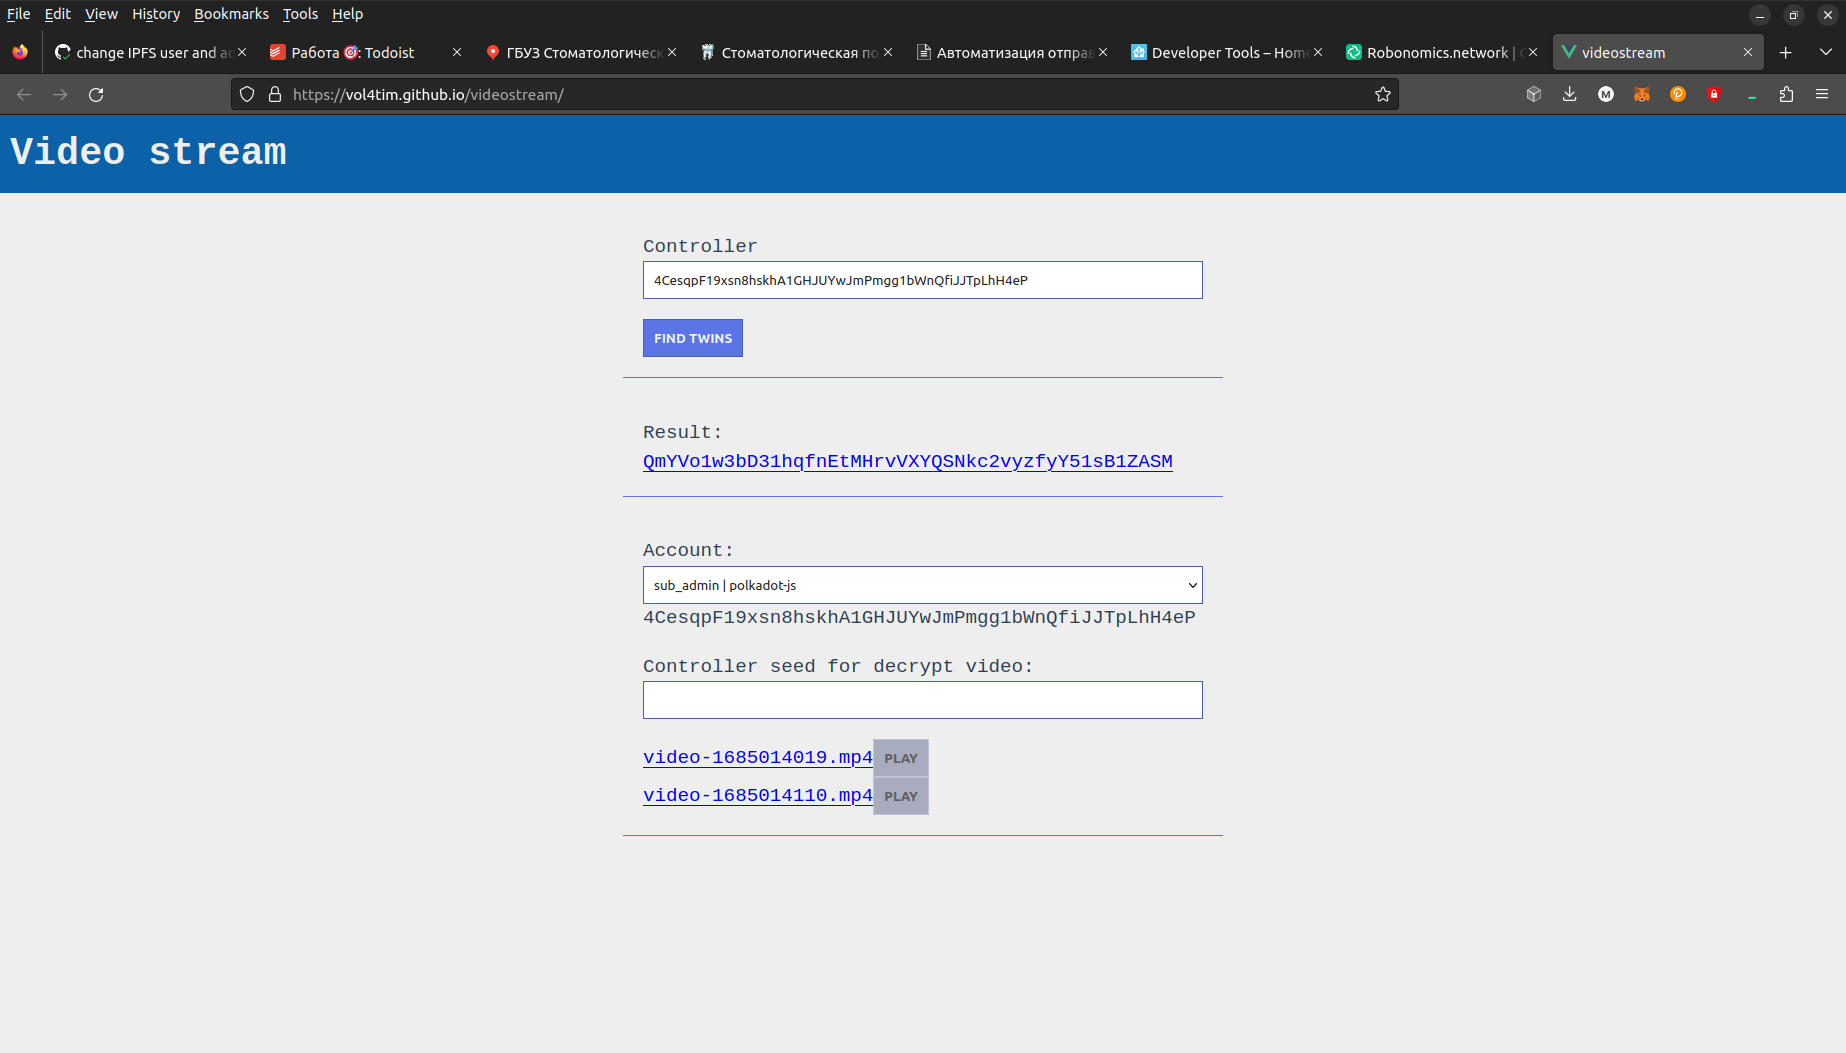
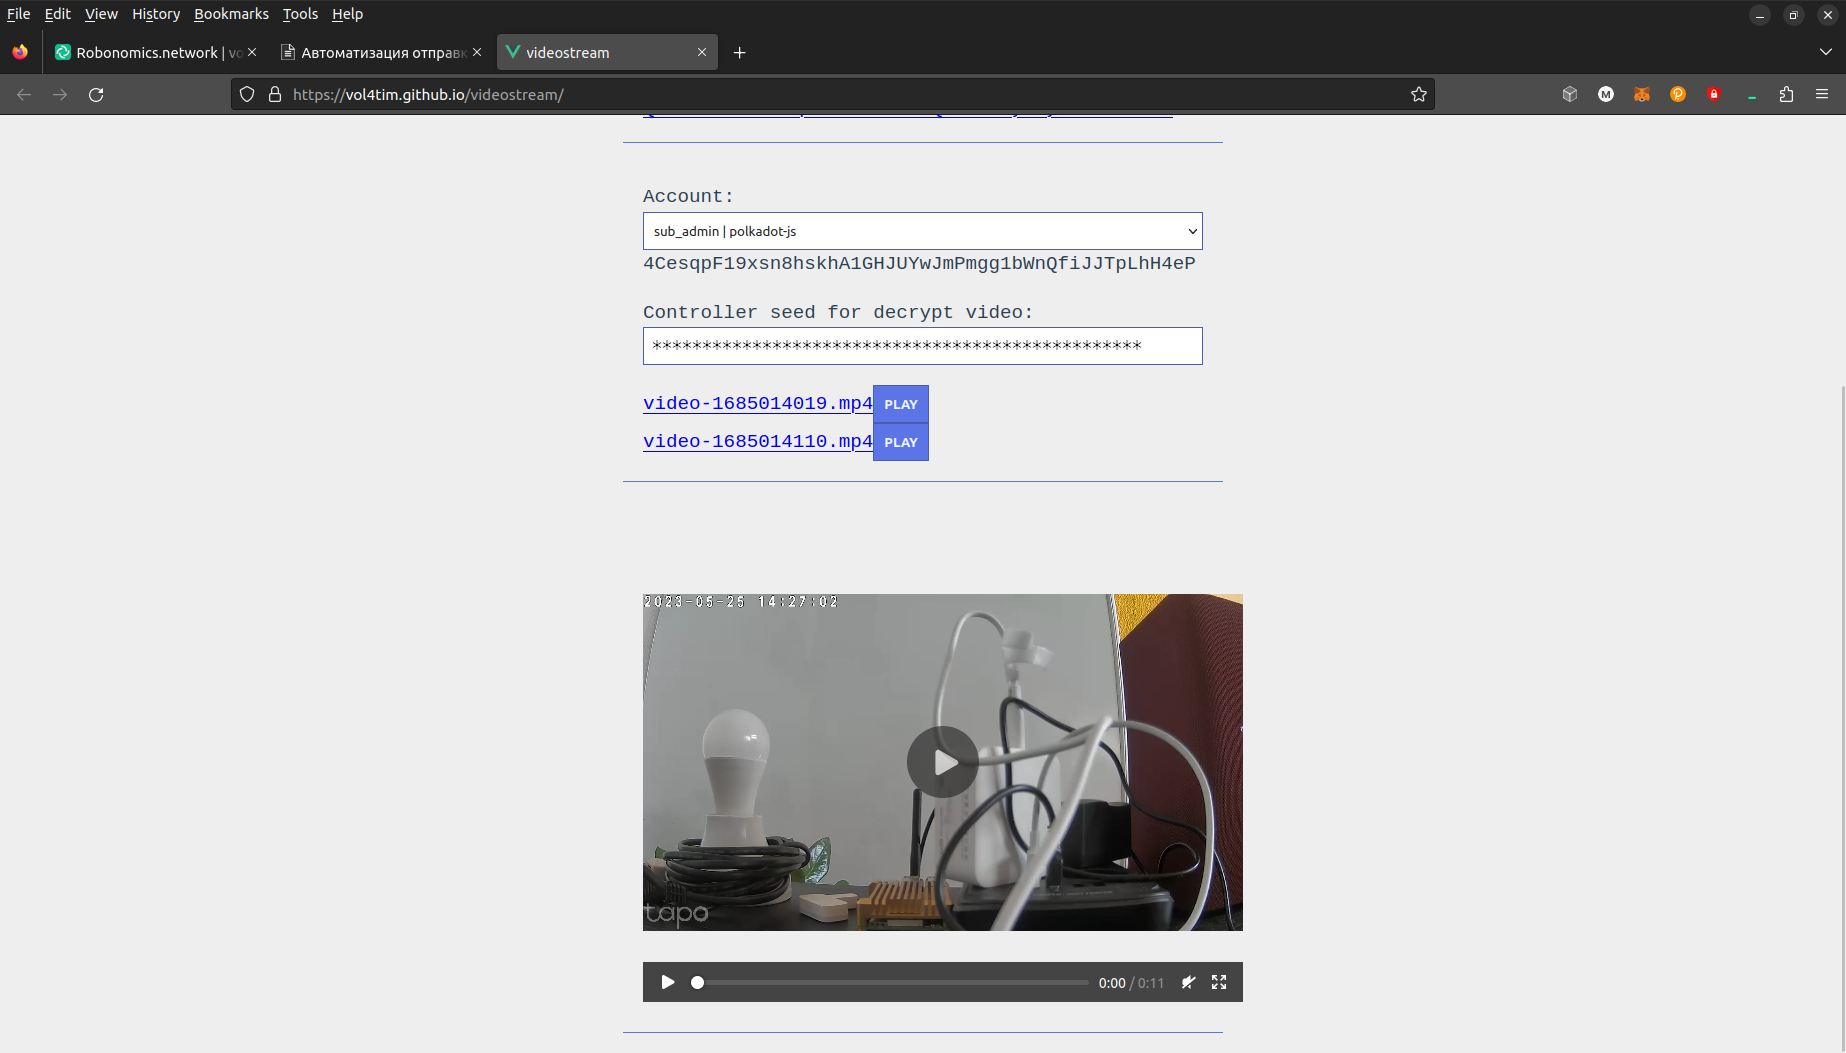
Since all the videos in the folder are encrypted with the controller key, you need to insert it to decrypt videos.
After that, the video playback button is activated. Click on it to download the video.
Couldn't complete
It was hard
It was ok
It was easy
Make a contribution
Robonomics wiki is open source. See something that's wrong or unclear? Submit a pull request.

