Robonomics integration setup
In this article, you will add Robonomics to Home Assistant. This allows Home Assistant to record datalogs with encrypted data to Robonomics Parachain and listen to launch commands from the parachain to control smart devices. Integration uses IPFS to store data and send IPFS hashes to datalog or launch functions.

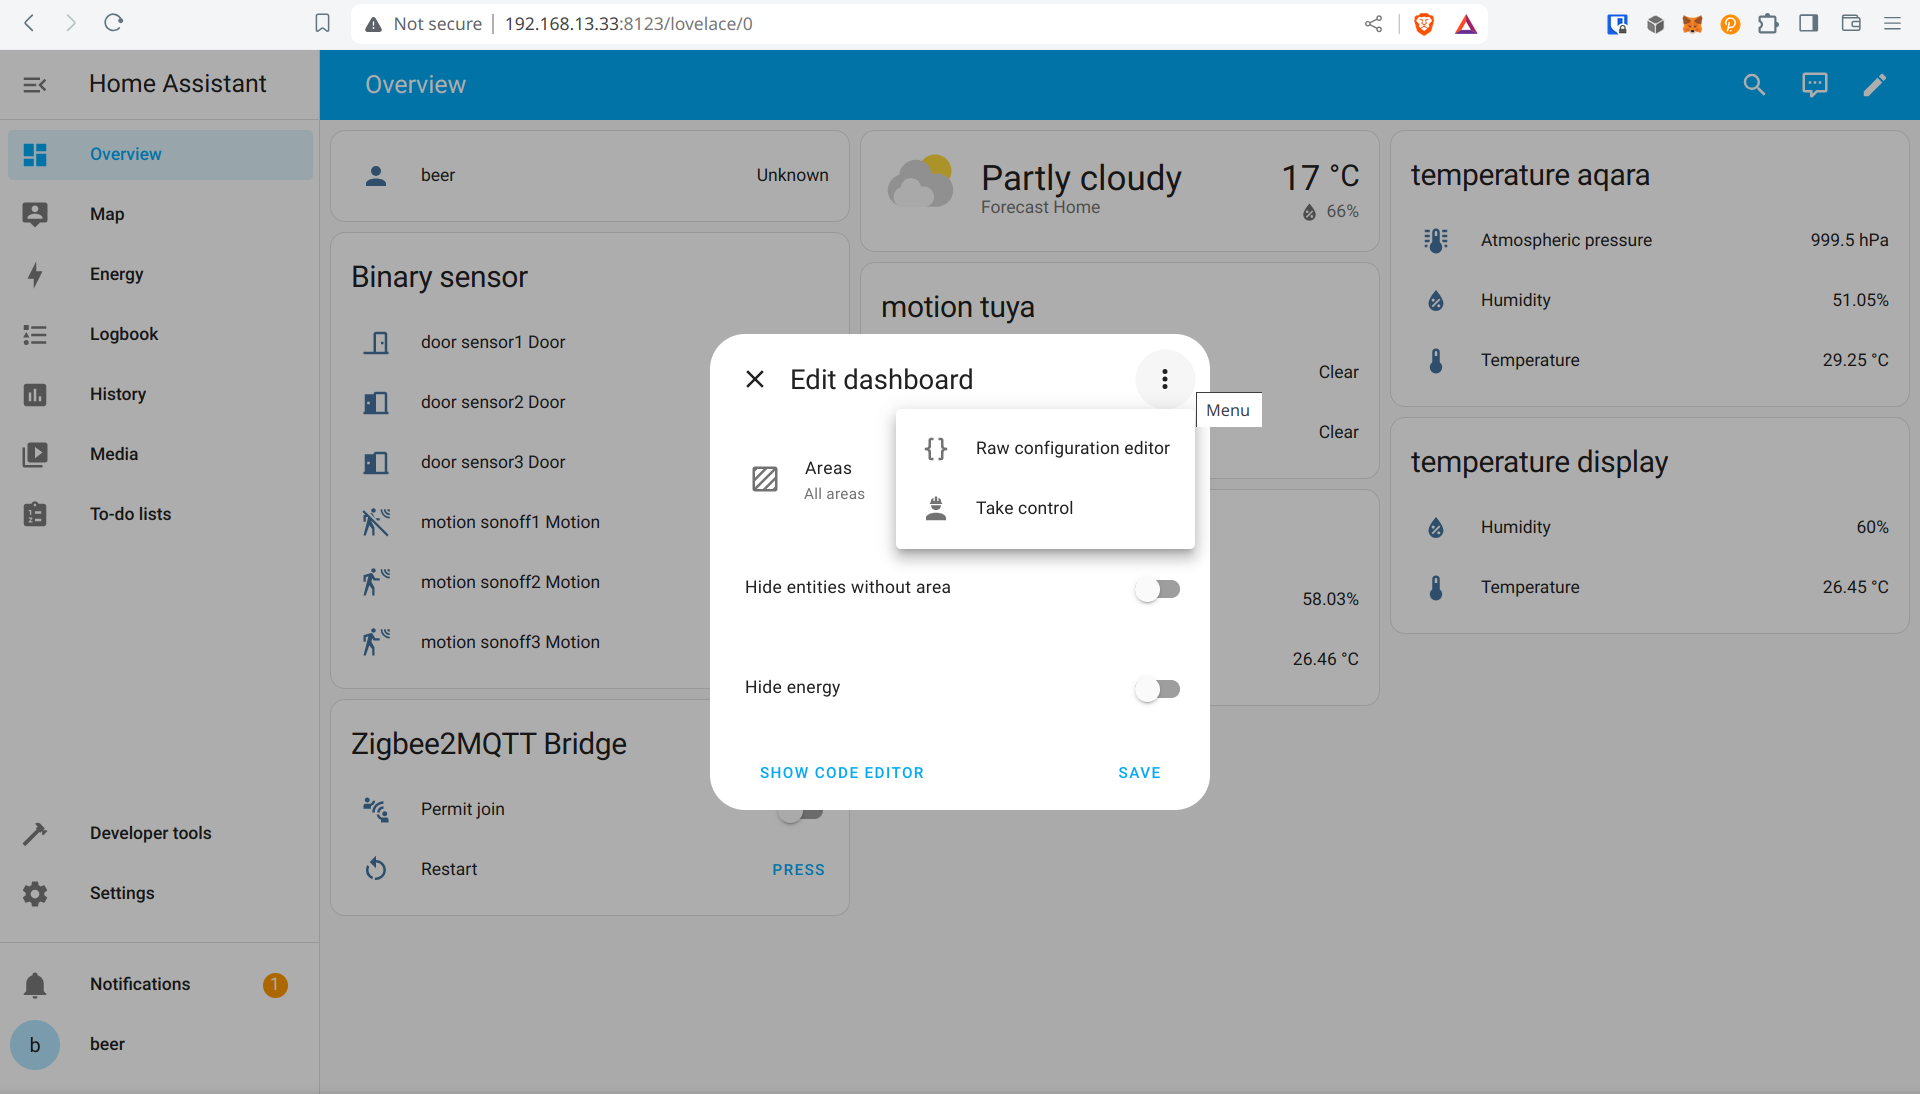
First of all you need to create config for your dashboard. For this open your Home Assistant dashboard and at the right top corner press “Edit Dashboard” button (a pencil).
In the opened pop-up, click on the three dots icon and select the “Take Control” button:

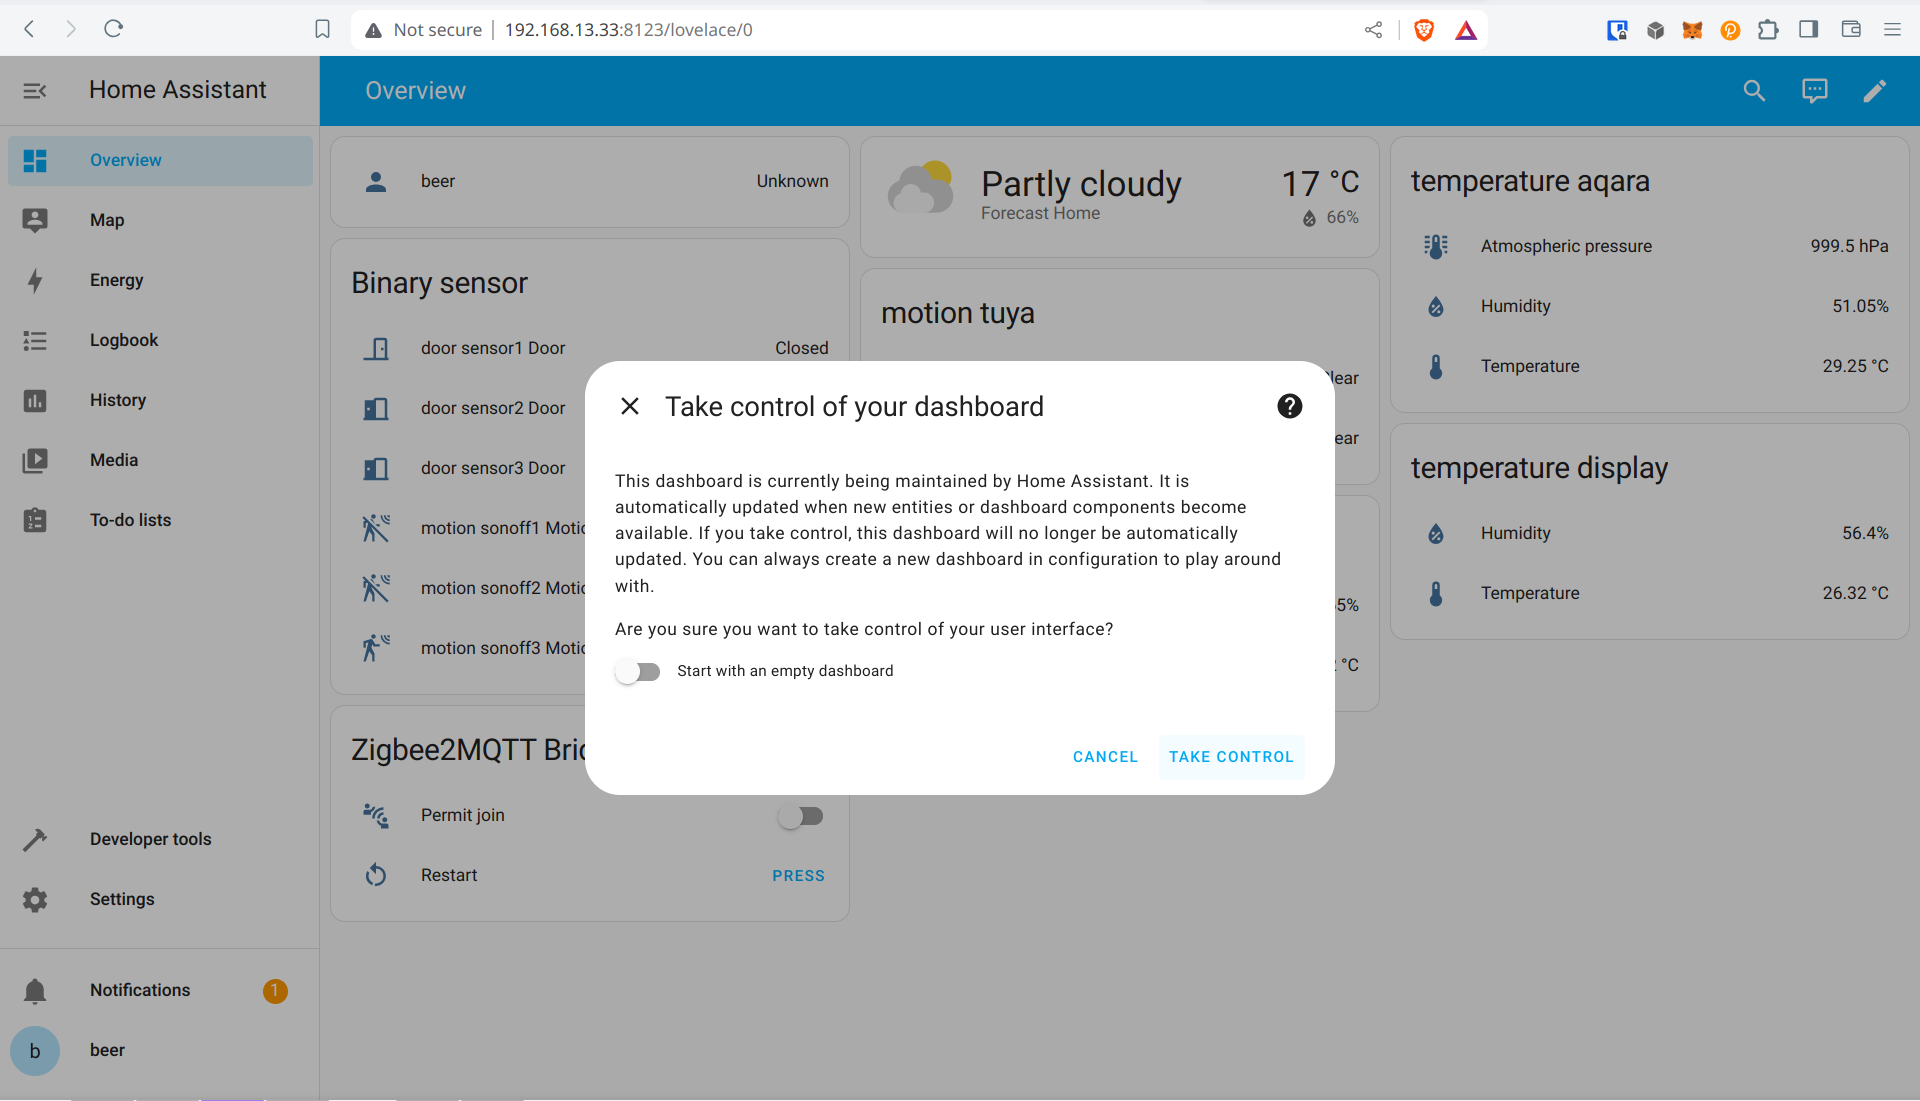
Press “Take Control” one more time:

Now you can install the Robonomics integration. To do so, follow these steps:
In the web interface of Home Assistant go to
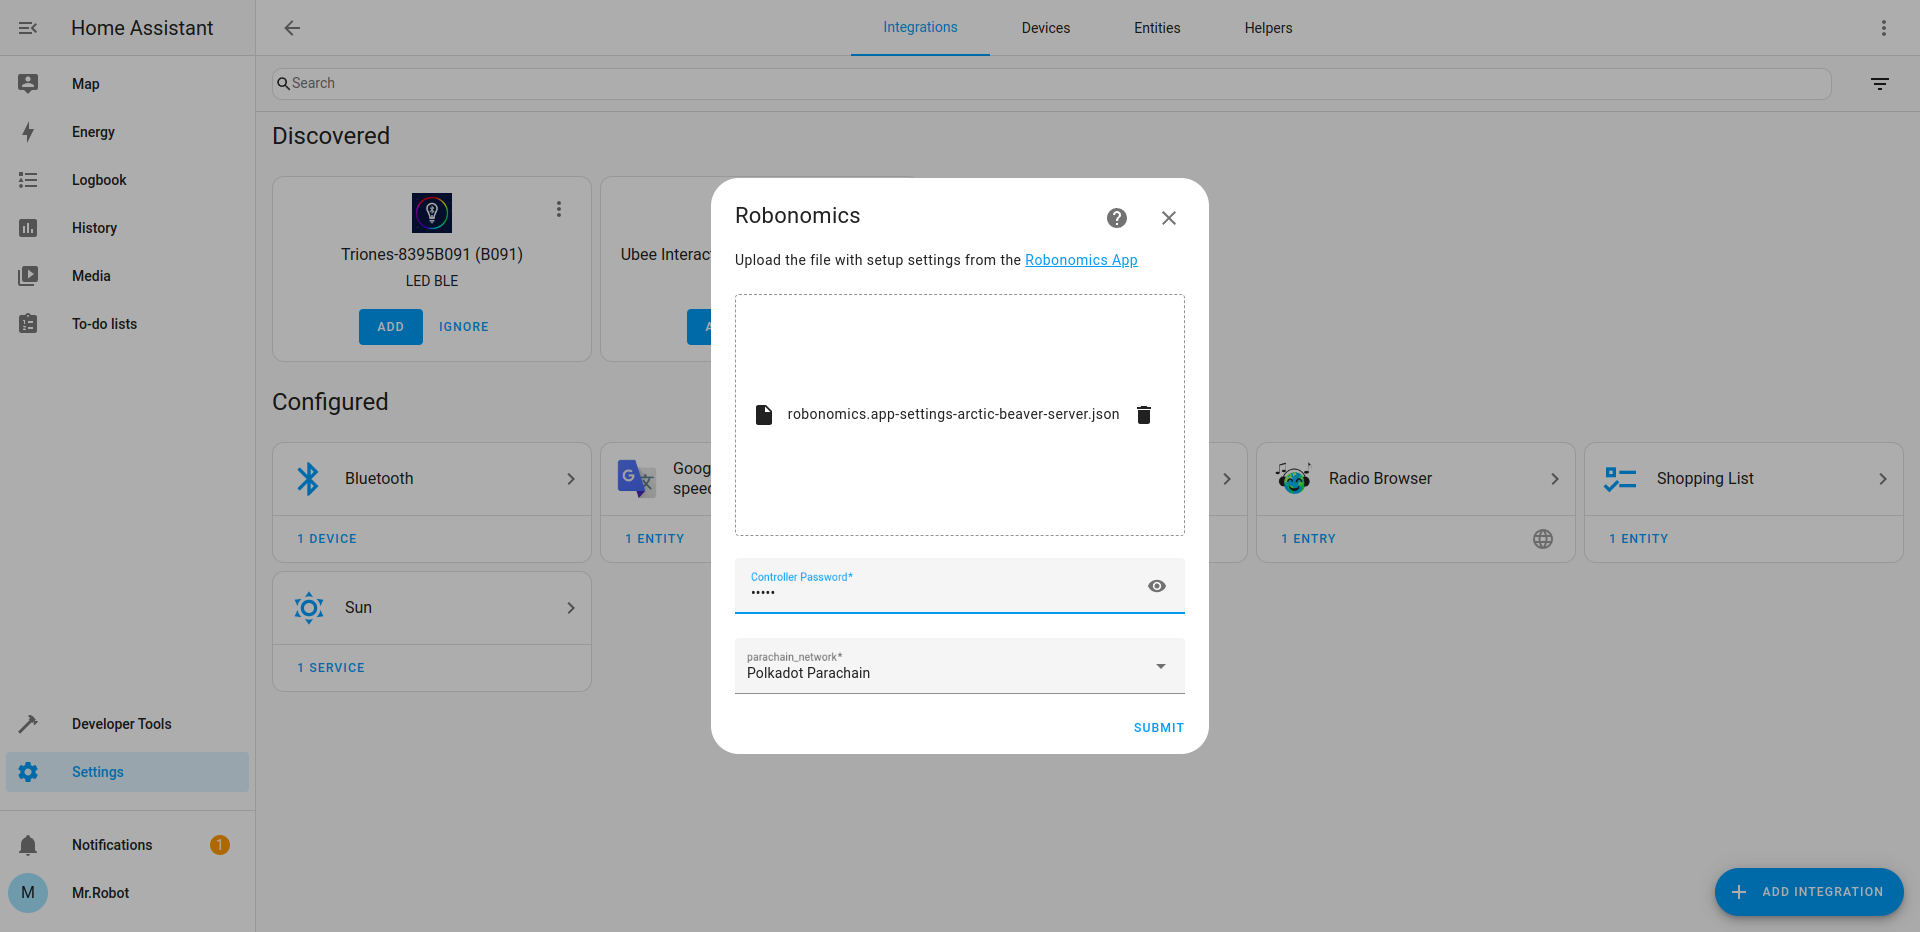
Settings->Device & Servicesand pressADD INTEGRATION. Search forRobonomics.Click on Robonomics, upload your setup file (named
robonomics.app-settings-<subscirption-name>-server.json, where<subscirption-name>is the name of your subscription), and enter password for theCONTROLLERaccount. Instructions on how to create the setup file can be found here.

Optional: You can choose which network to use.
Press
SUBMITafter finishing the configuration. If you filled in everything correctly, you will see the success window.The installation may take approximately 10–15 minutes, depending on your internet connection.
That’s all! You have fully setup Robonomics Integration into Home Assistant. Now you can use all
Robonomics Web Services. To find out more about them, go to “Use” section.
Couldn't complete
It was hard
It was ok
It was easy
Make a contribution
Robonomics wiki is open source. See something that's wrong or unclear? Submit a pull request.
