Altruist Setup
This guide walks you through setting up and activating an Altruist Outdoor sensor. You’ll connect the sensor to Wi-Fi, configure its location, and activate a subscription using XRT tokens. Additionally, instructions for integrating the sensor with Home Assistant via HACS or manual installation are provided.

Full setup of Altruist (dapp v0.8.2) + its integration with RISC-V Home Server
Activate Robonomics Subscription
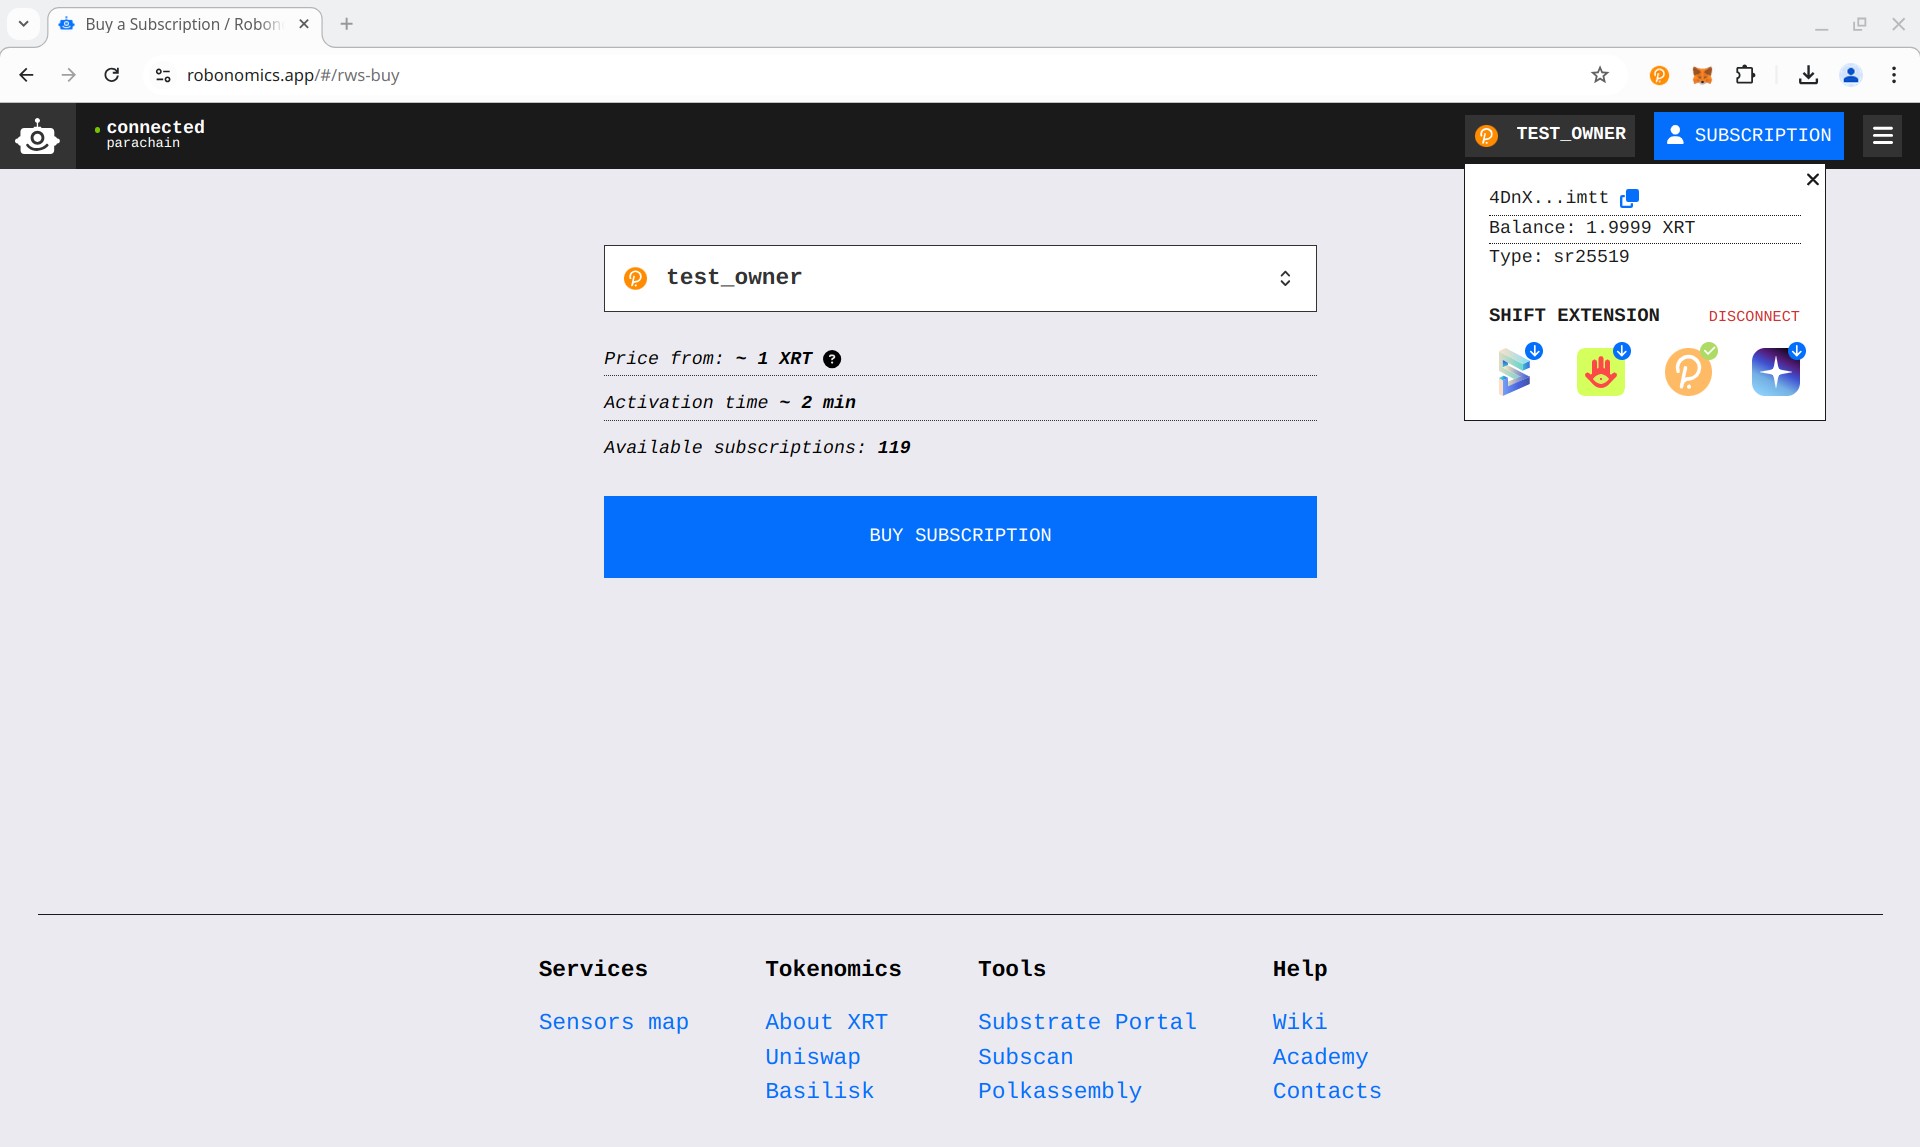
Robonomics Polkadot account.- Navigate to the Robonomics dApp subscription page.
- Click on Account and connect your wallet. Your account address and balance will be displayed.
If you don’t have an account, follow this guide to create one.
- Сlick
BUY SUBSCRIPTIONand sign the transaction. Wait for the activation process to complete. - Once activated, you will be redirected to the setup page, where you can see your subscription name and expiration date.

- Save your account address — you will need it during the sensor setup. You can copy it from the “OWNER” section or by clicking your account name in the top-right corner and selecting the copy button.
Sensor Setup
- Plug in the sensor to a power socket.
- The board will create a Wi-Fi network named Altruist-xxxxxxxxx. Connect to it from your phone or computer. You should be automatically prompted to open the authorization window.
- If not, open a browser and go to 192.168.4.1.
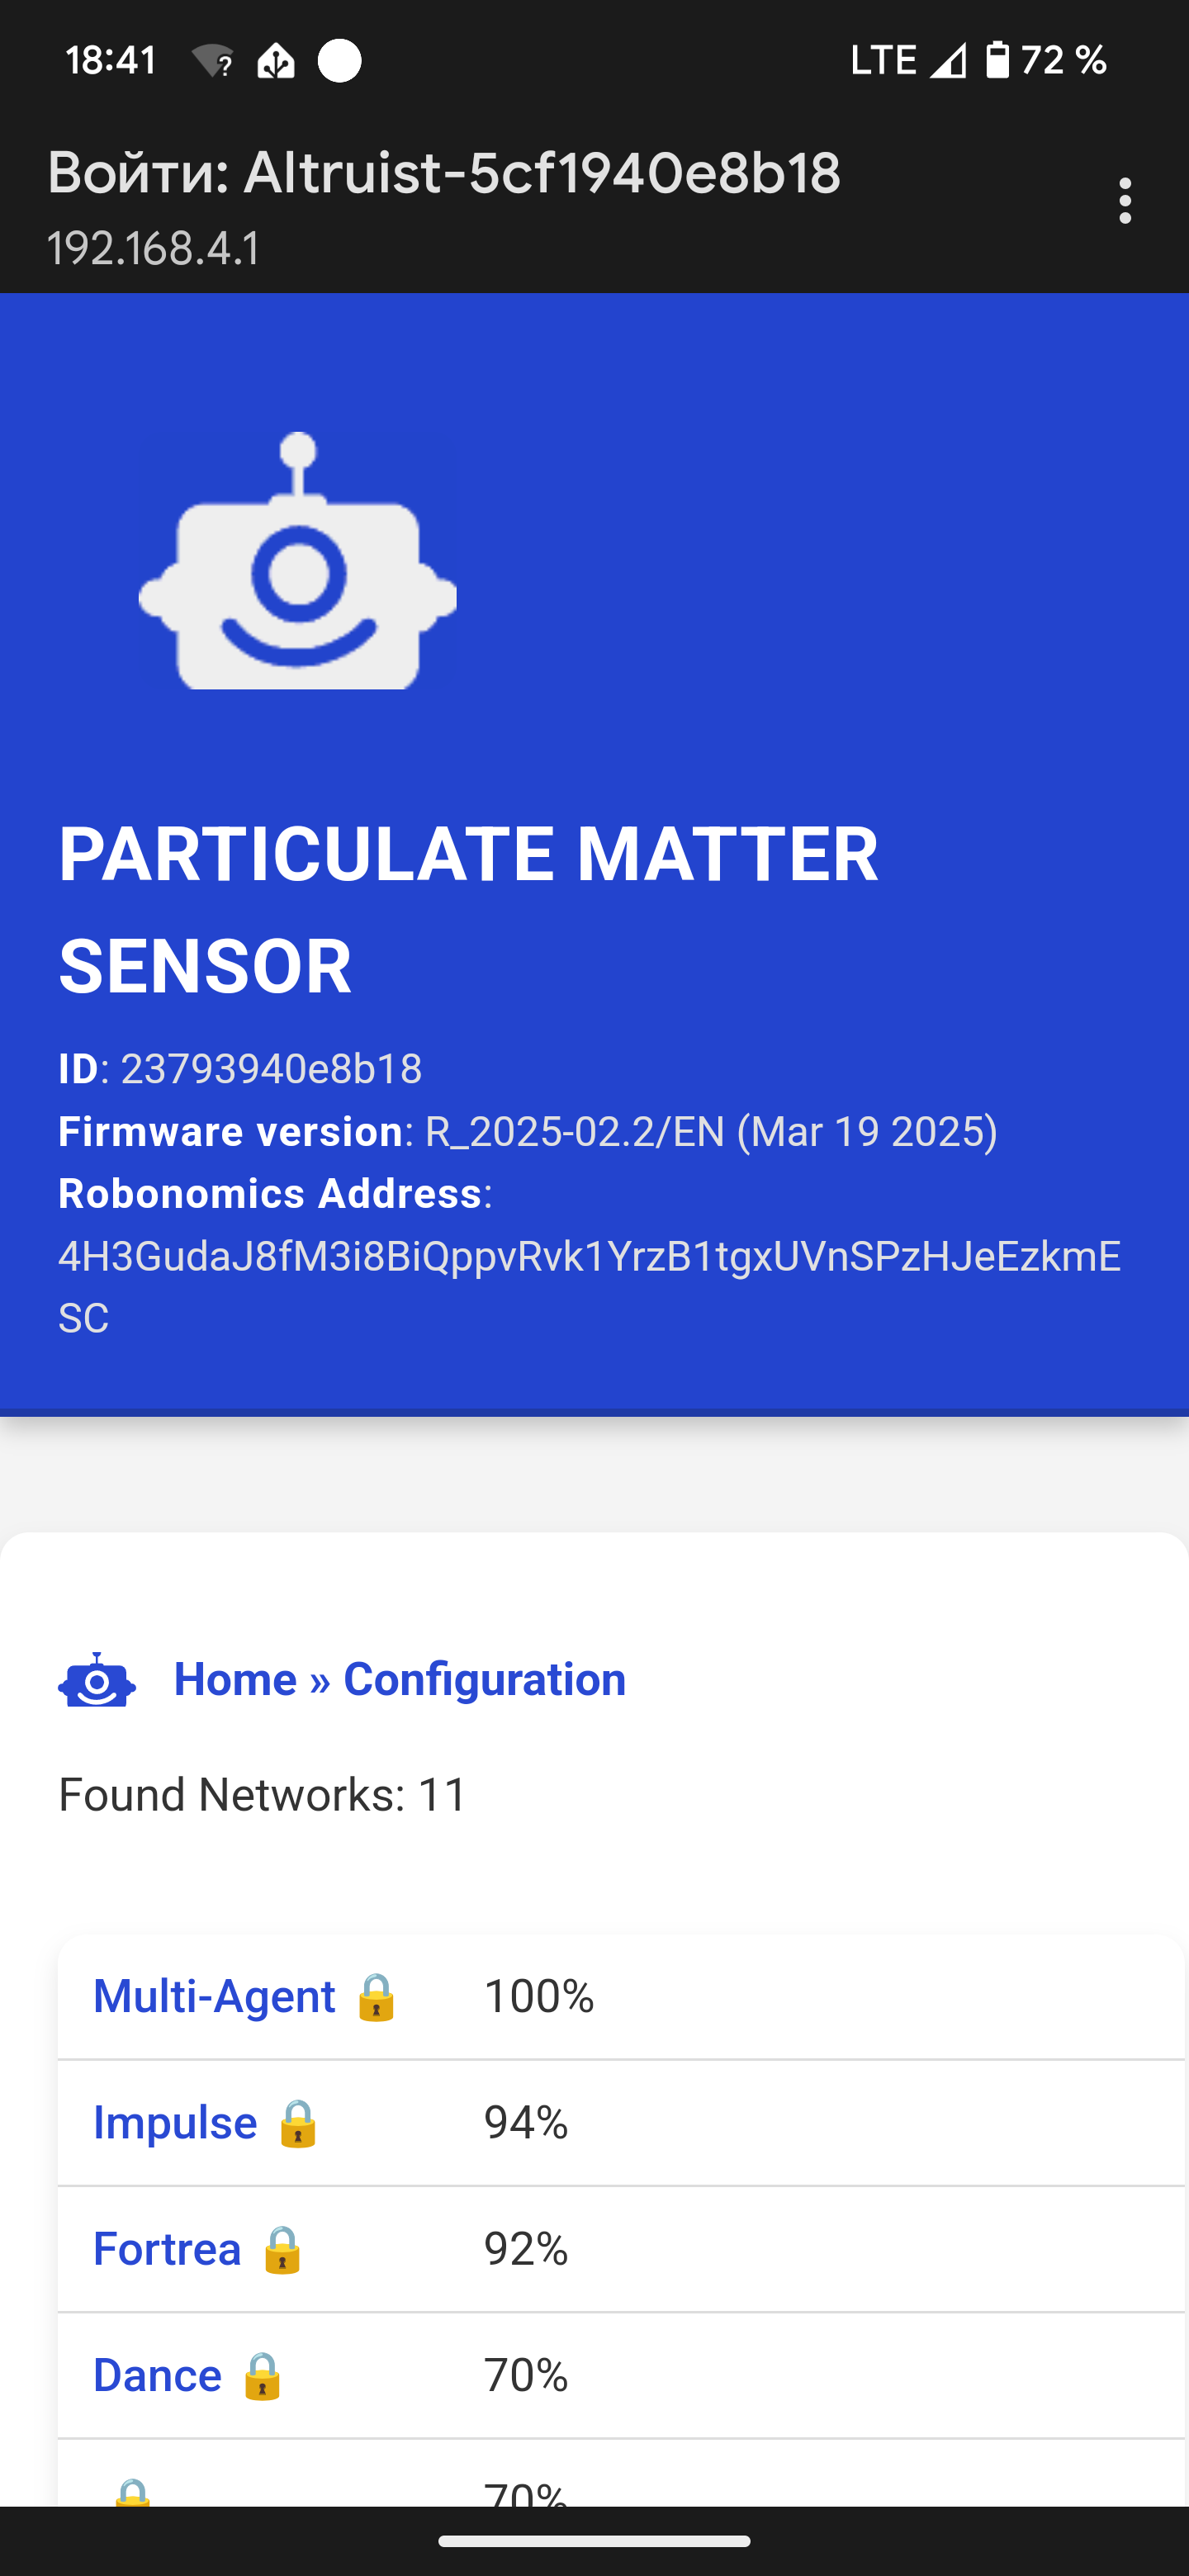
- Configure the Wi-Fi settings:
- Select your Wi-Fi network from the list or enter it manually if it doesn’t appear.
- Enter the password in the “WI-FI SETTINGS” field.
- If you have multiple Altruist devices on the same network, change the Local Hostname. After setting up WiFi, you can connect to your sensor using this hostname.
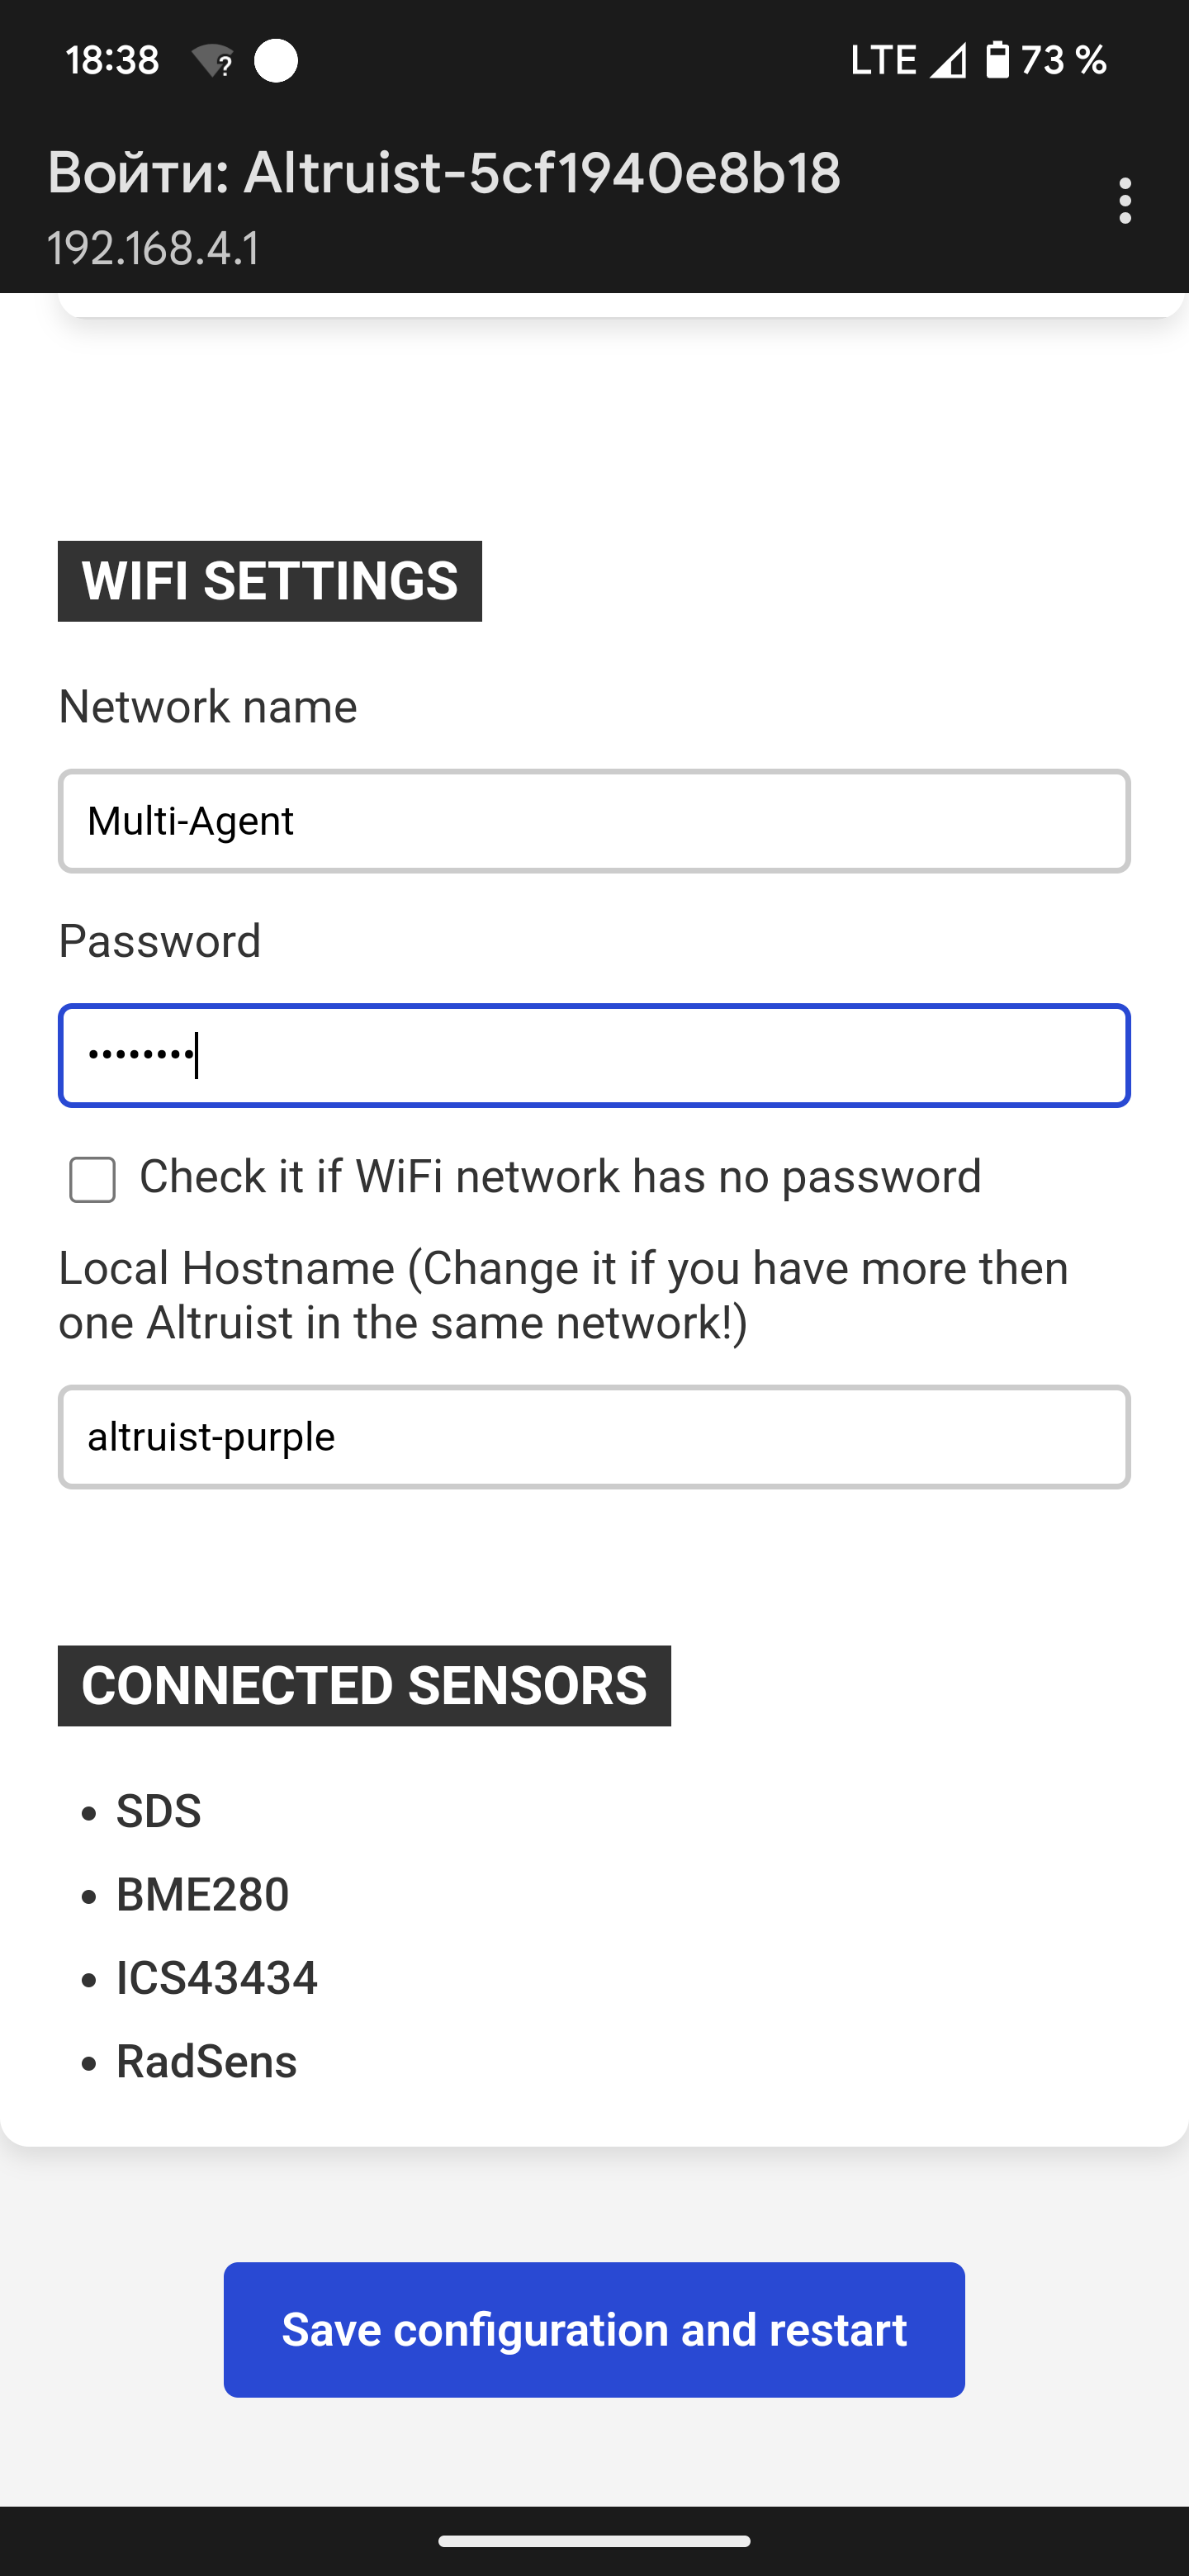
- Save Configuration
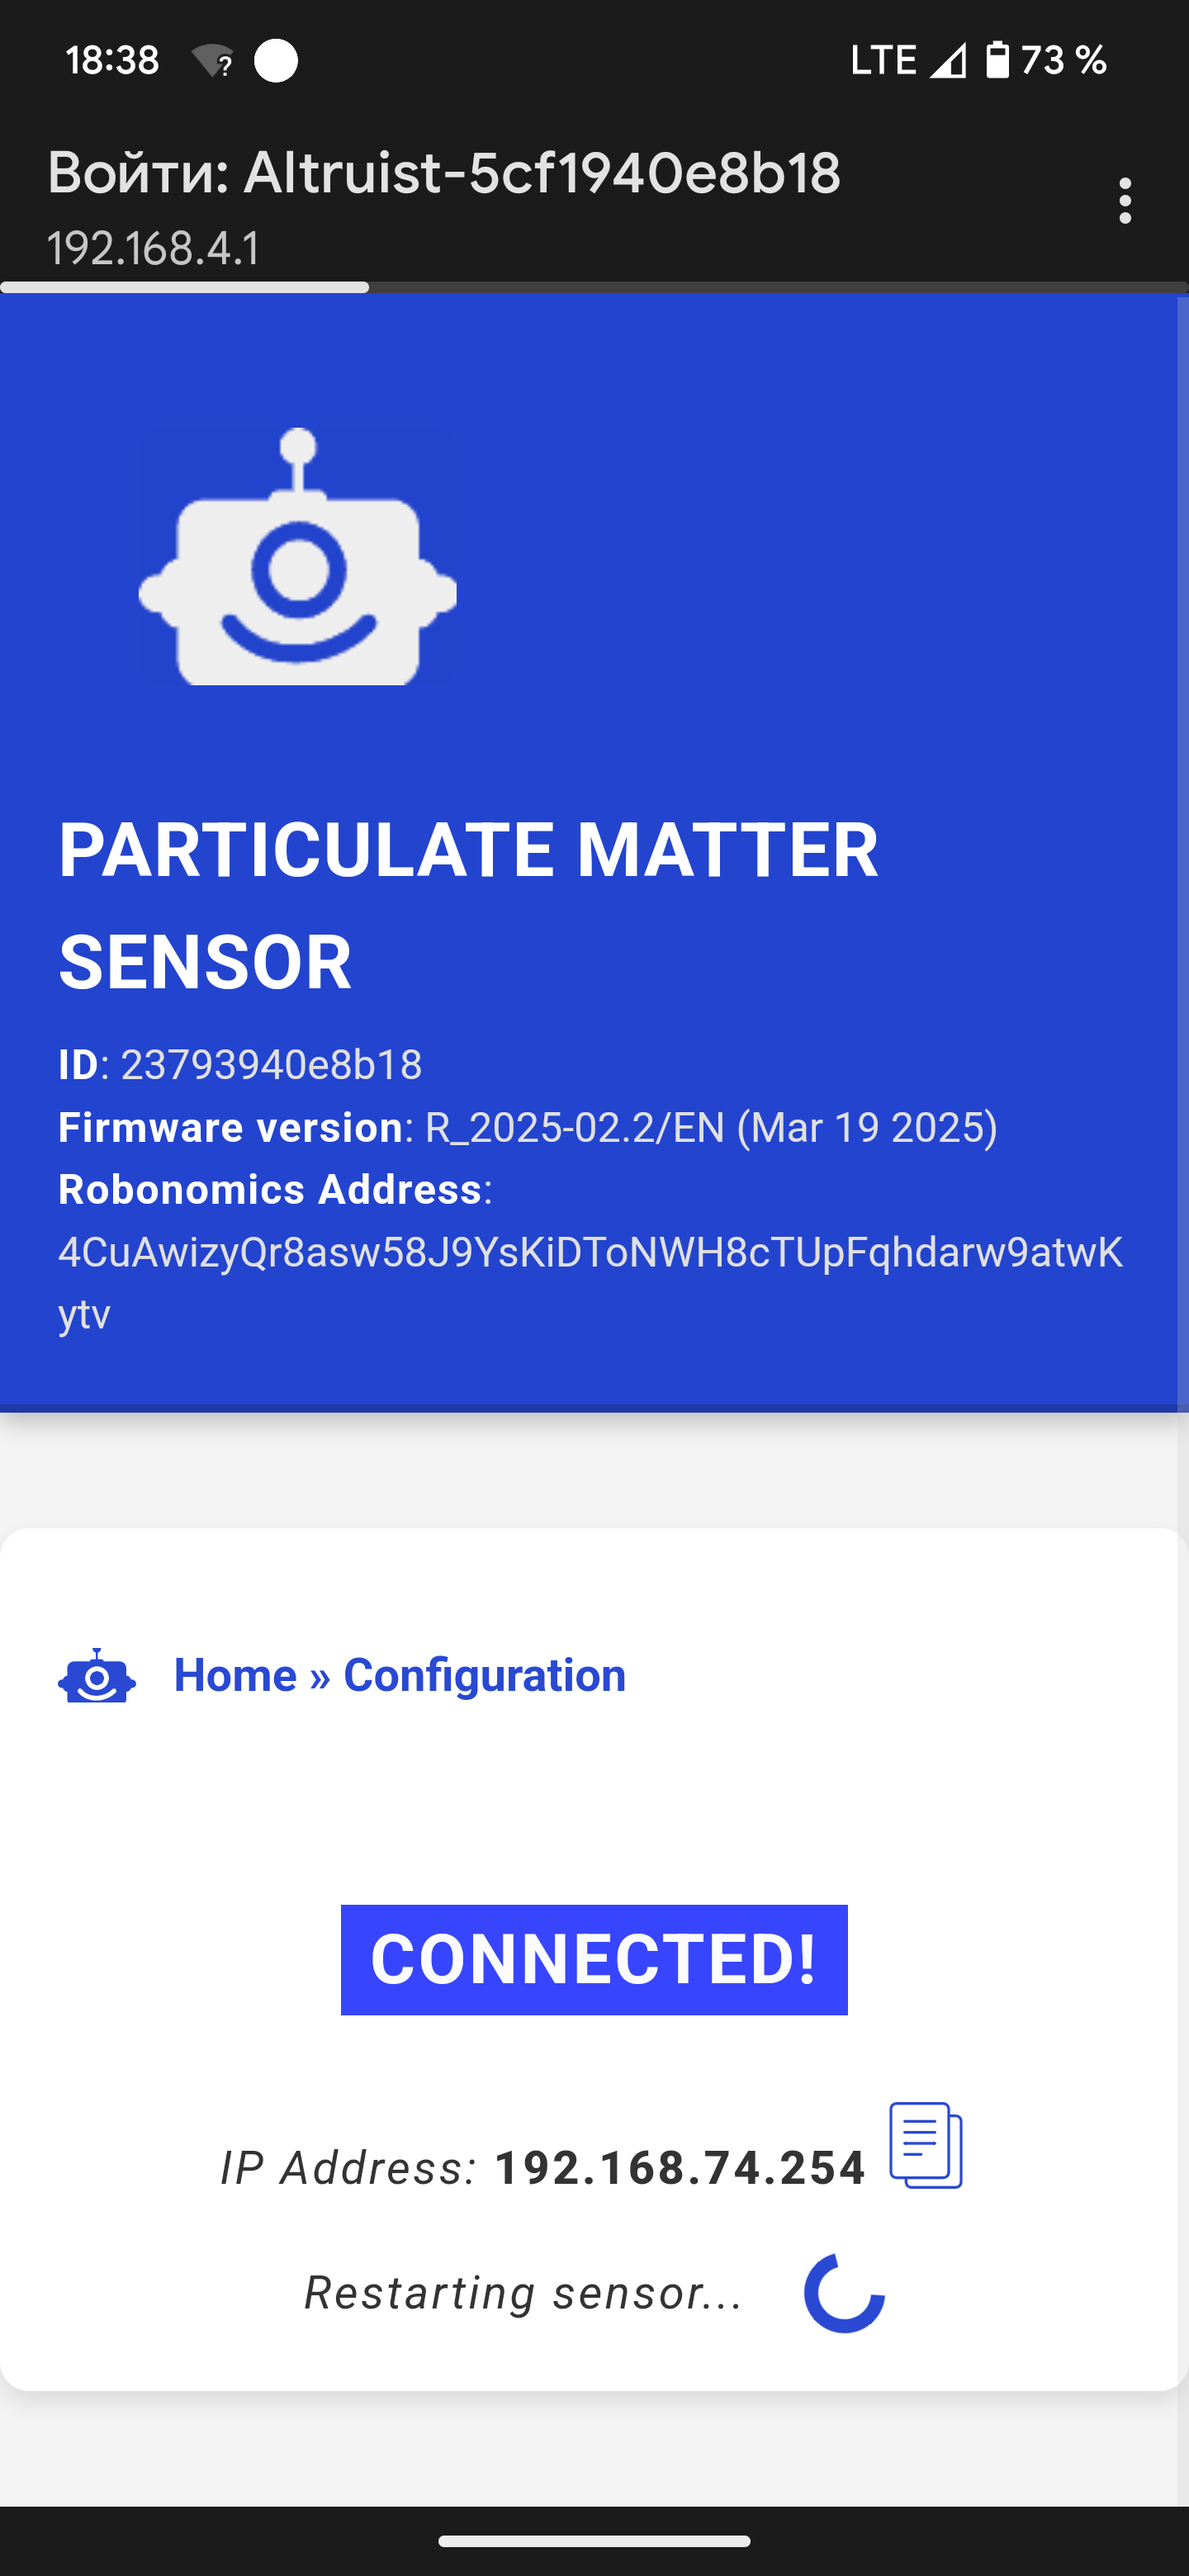
- Click the
Save Configuration and Restartbutton and wait for the sensor to connect to WiFi. Once connected, it will display its new IP address — copy it, as this is an alternative way to connect to your sensors after setup.
- Enter your Robonomics details:
- Open the Altruist web interface at http://altruist.local (or use your custom Local Hostname followed by
.localif you changed it). Then, navigate to theConfigurationpage. - In the
Robonomicssection paste the RWS Owner Address you copied earlier into the designated field.
- Set the sensor location:
In the
GPS & Temperature Correctionsection enter the coordinates of the sensor’s installation site.You can find coordinates using online maps or convert an address to latitude/longitude using this link.
WARNINGThe sensor coordinates will then be displayed on a publicly available map. If you do not want to show your private information, write close, but not exact coordinates.
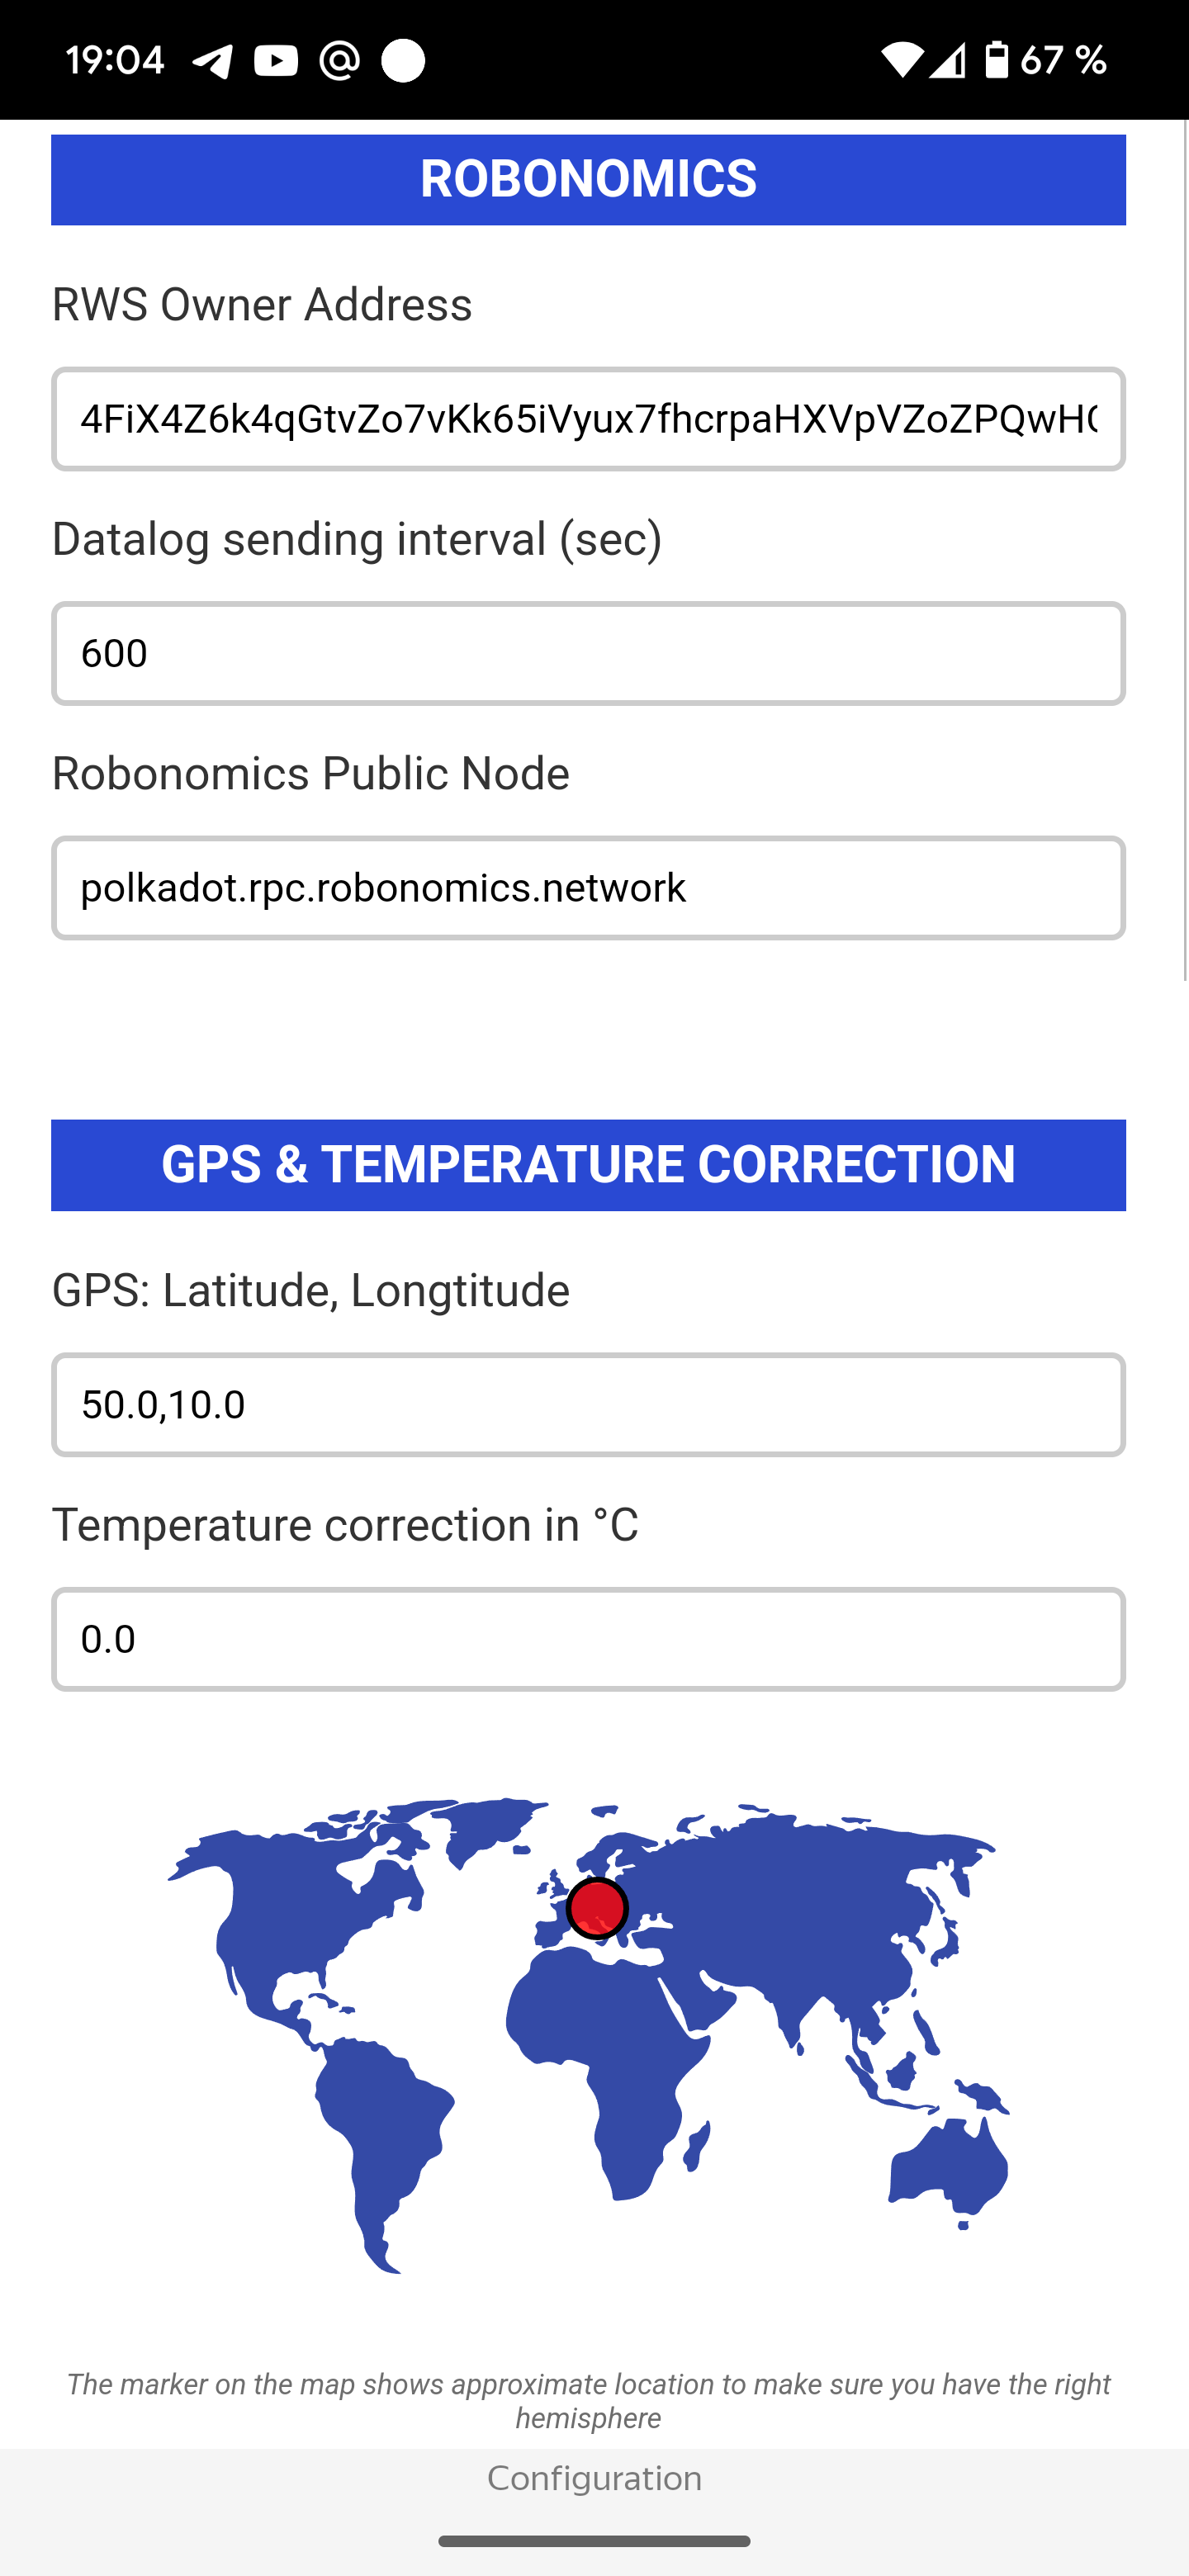
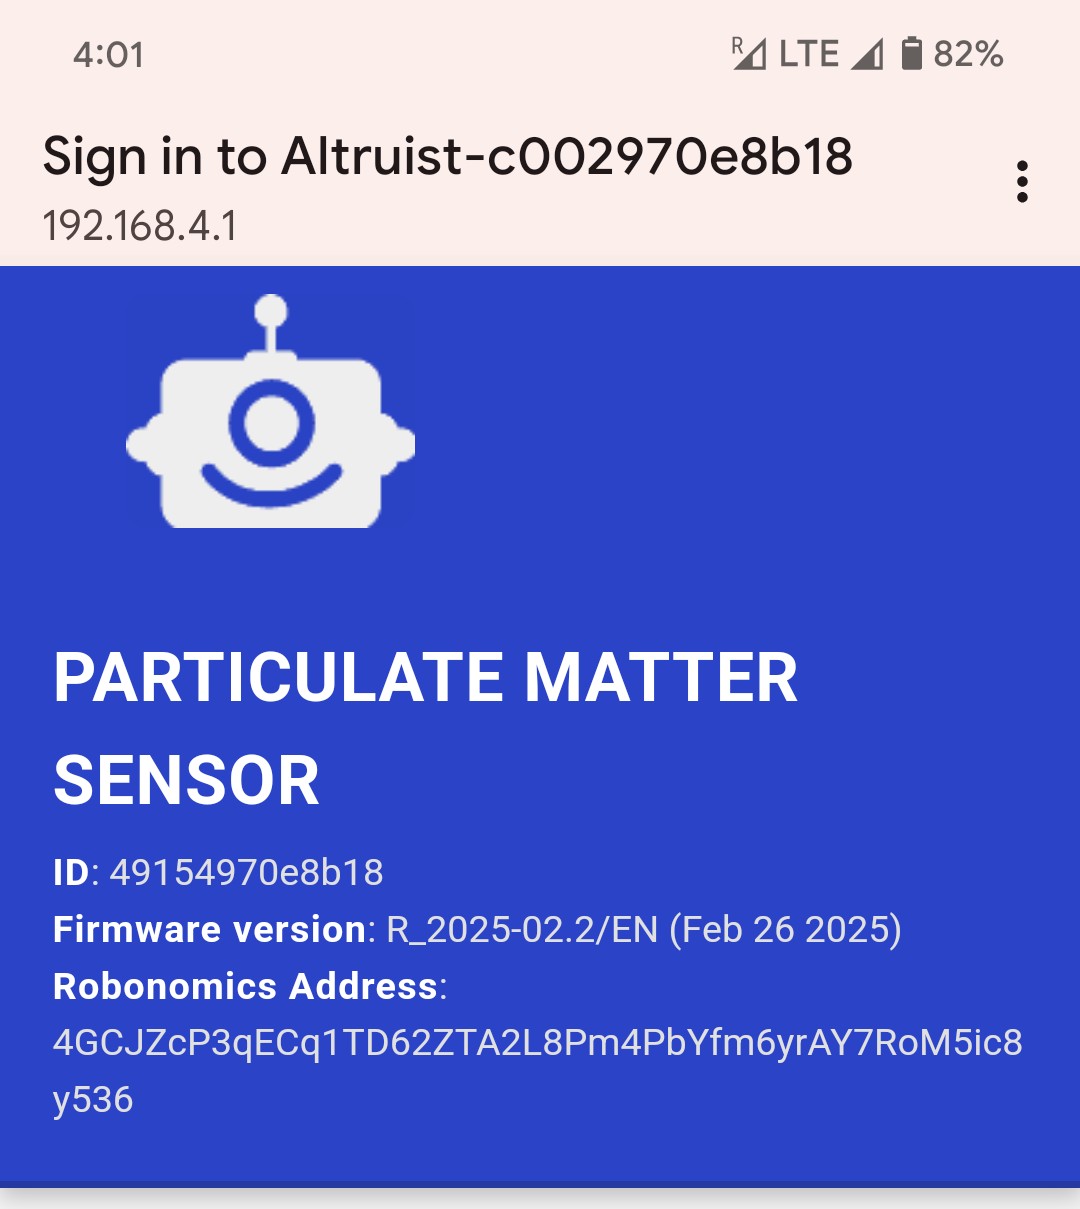
- Copy the Altruist “Robonomics Address”:
- You will find it at the top of the page. Save it for the final step.
- Click “Save configuration and restart” at the bottom of the page. The board will reboot.
Altruist activate
The final step in the setup process is adding the Altruist address to your Robonomics Subscription.
Go back to the Setup page.
Scroll down to the “Users in subscription” section.
In the “Add a user” field, paste the Altruist Robonomics address you copied earlier.
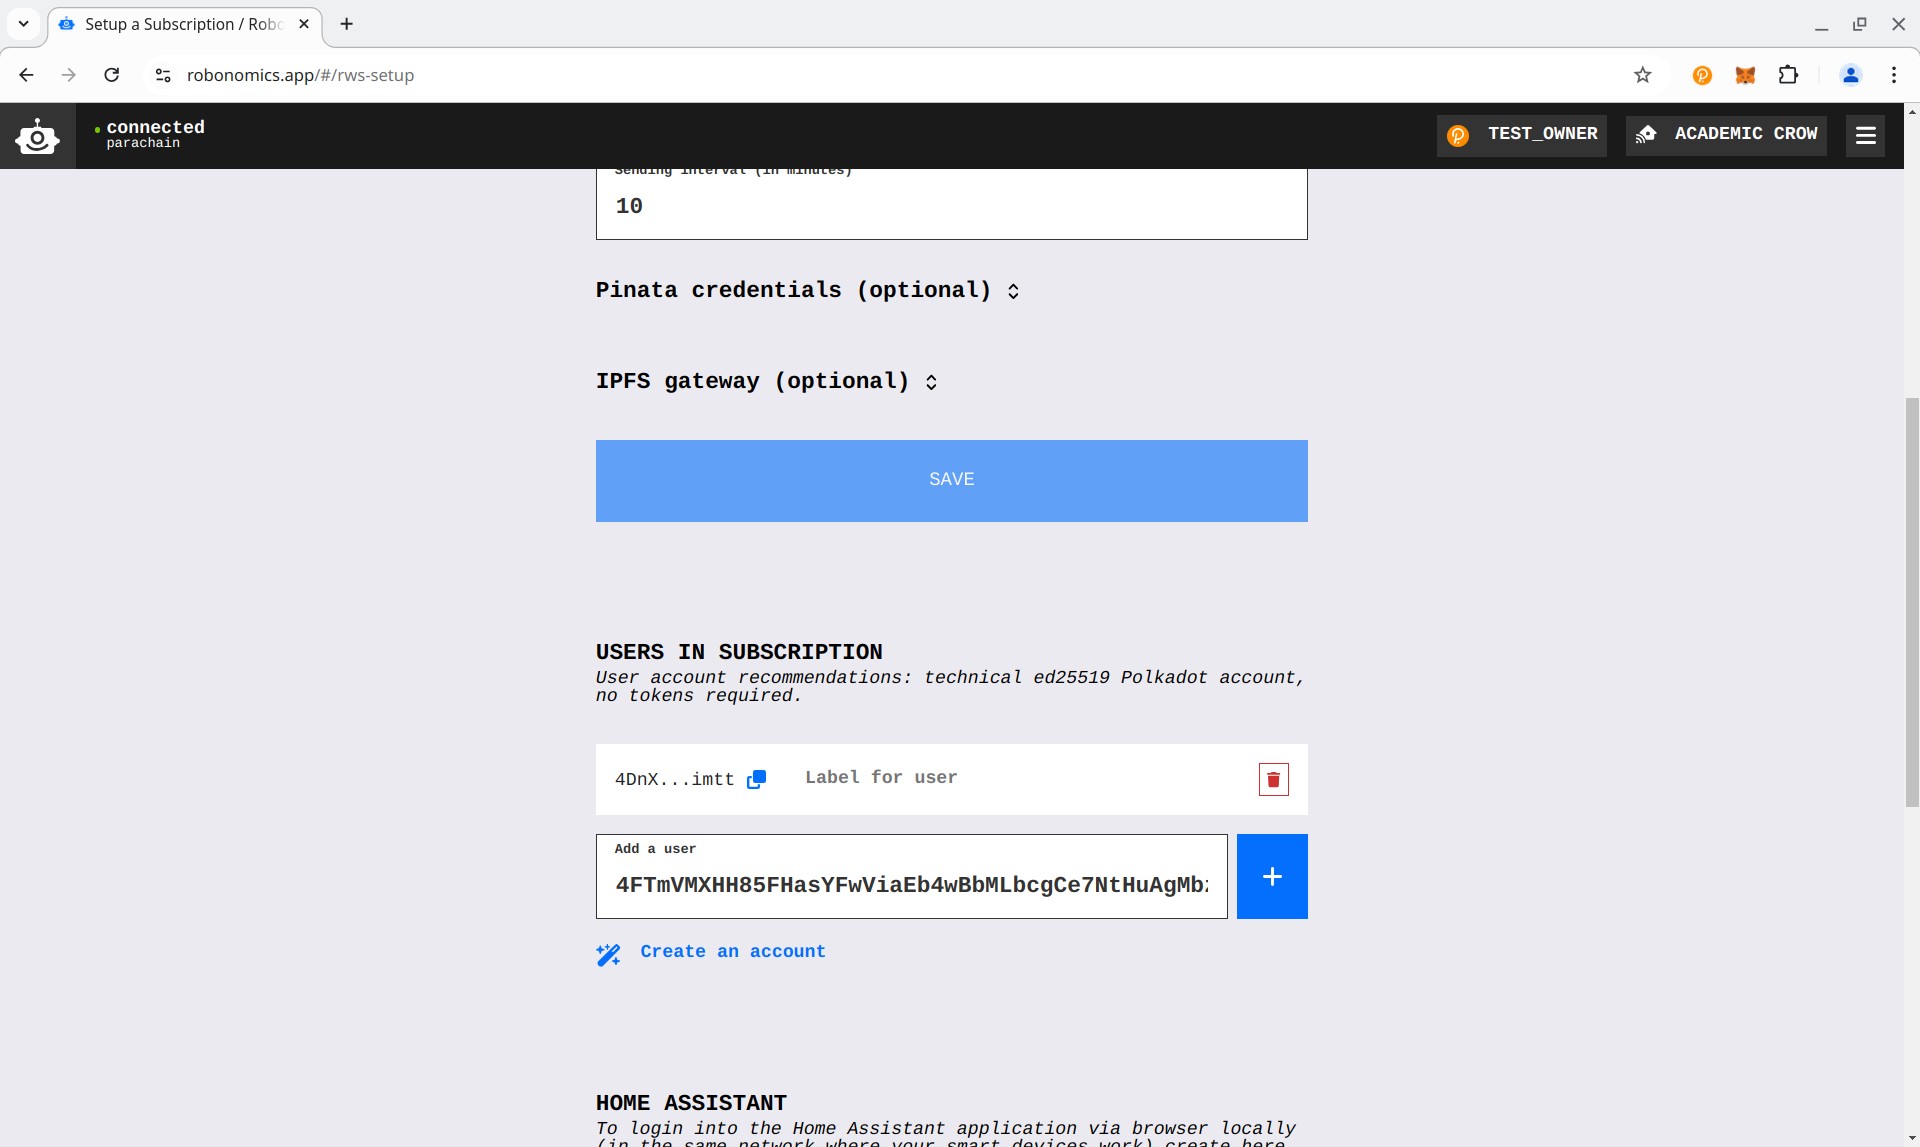
Click the plus (+) button and sign the message.
Wait for the operation to complete.
That’s it! Your setup is now complete. 🎉
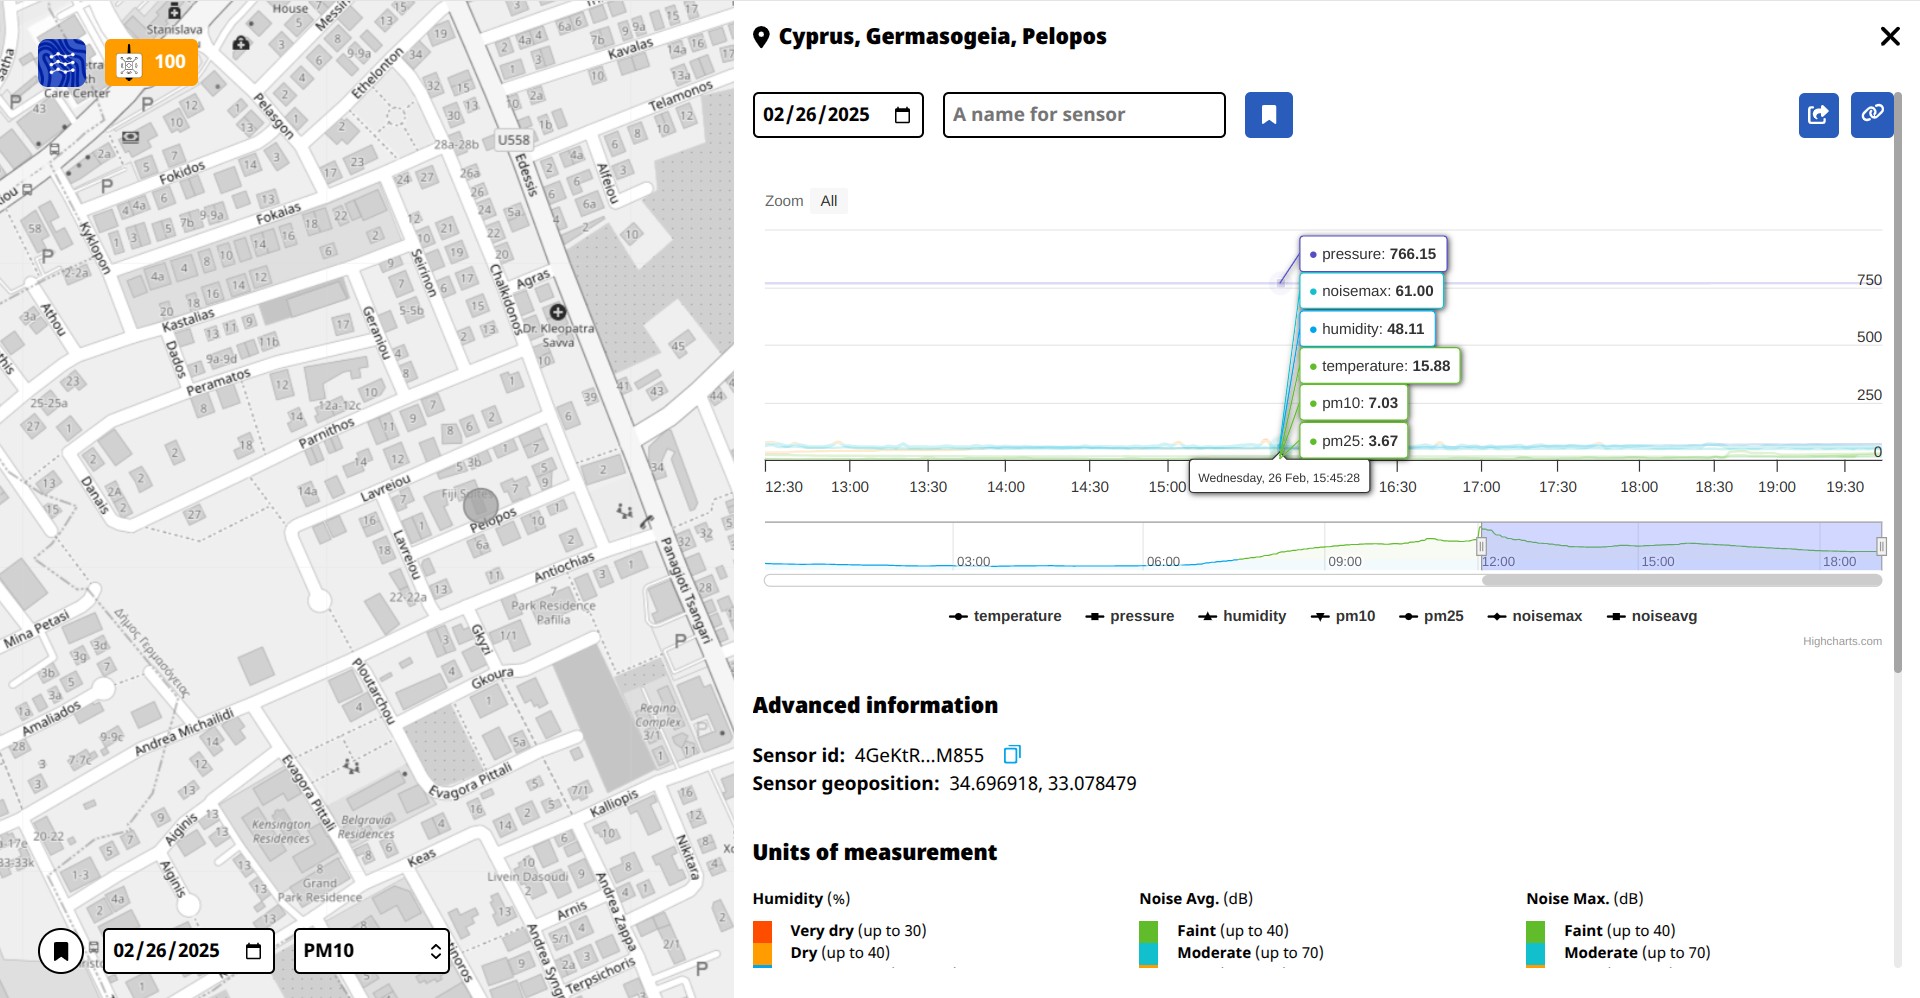
You can now find your Altruist on the Robonomics Sensors Social map. 🚀
Home Assistant
There are two ways to add Altruist to Home Assistant:
Option 1: HACS (Recommended)
The easiest way to add Altruist is through HACS. You can find a brief setup guide here
Steps:
Once HACS is installed, open it.
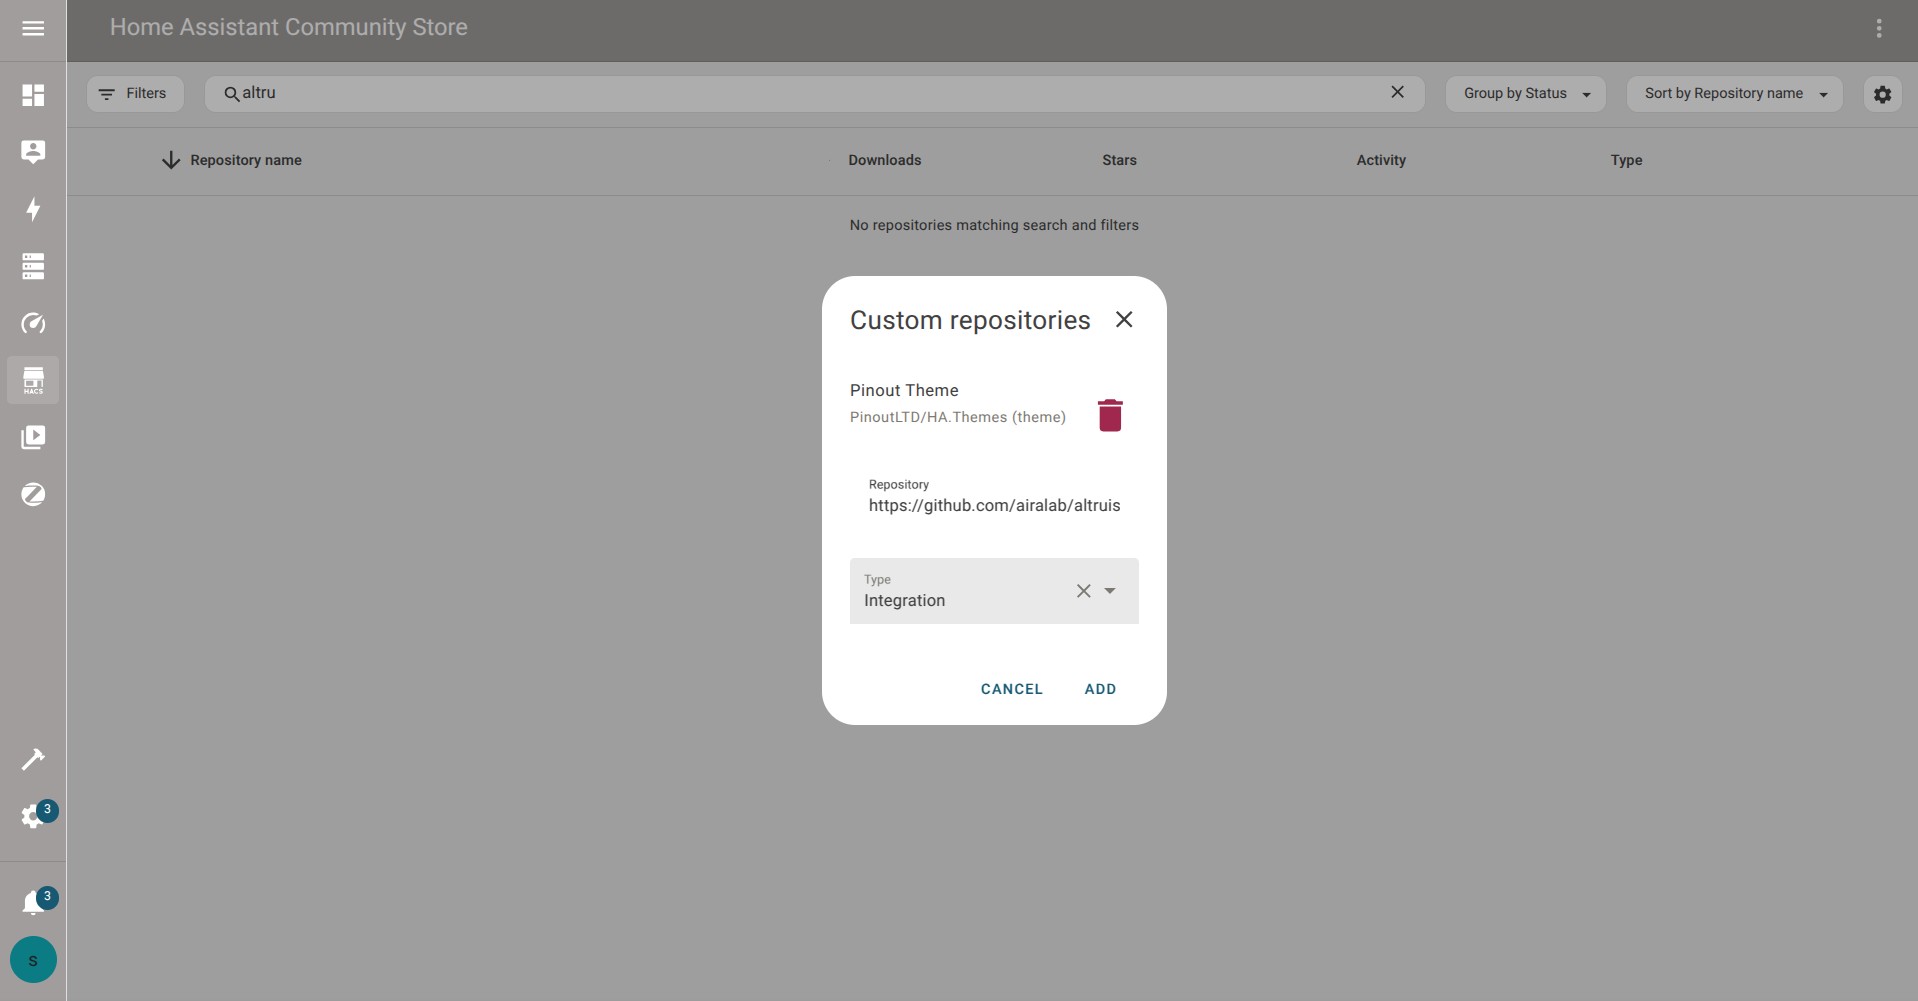
Click the three dots in the top-right corner and select “Custom repositories”.
In the pop-up window, enter the following URL:
https://github.com/airalab/altruist-homeassistant-integration
- Set the type to “Integration” and click “ADD”.
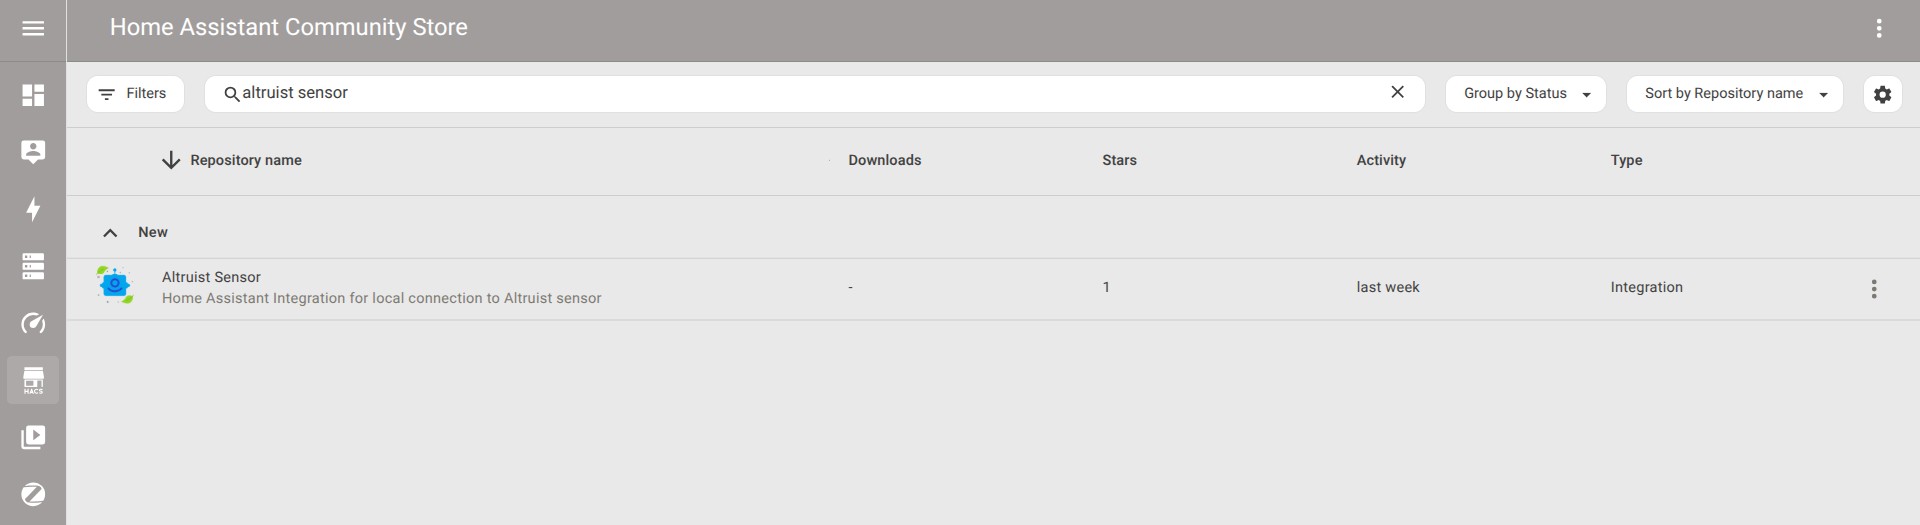
Search for the Altruist Sensor integration.
Click the Download button, then restart Home Assistant once the integration is installed.
Option 2: Manual Installation
- Under the
homeassistantuser, clone the project repository:
git clone https://github.com/airalab/altruist-homeassistant-integration.git- If you already have any custom integrations, move the
altruistfolder to yourcustom_componentsdirectory:
cd altruist-homeassistant-integration
mv custom_components/altruist ~/.homeassistant/custom_components/
- If you don’t have any custom integrations, move the entire custom_components directory:
cd altruist-homeassistant-integration
mv custom_components/ ~/.homeassistant/
Configuration
After installation and restarting Home Assistant, the integration will automatically detect Altruist on your network.
Go to Settings → Devices & Services.
Add the Altruist Sensor.
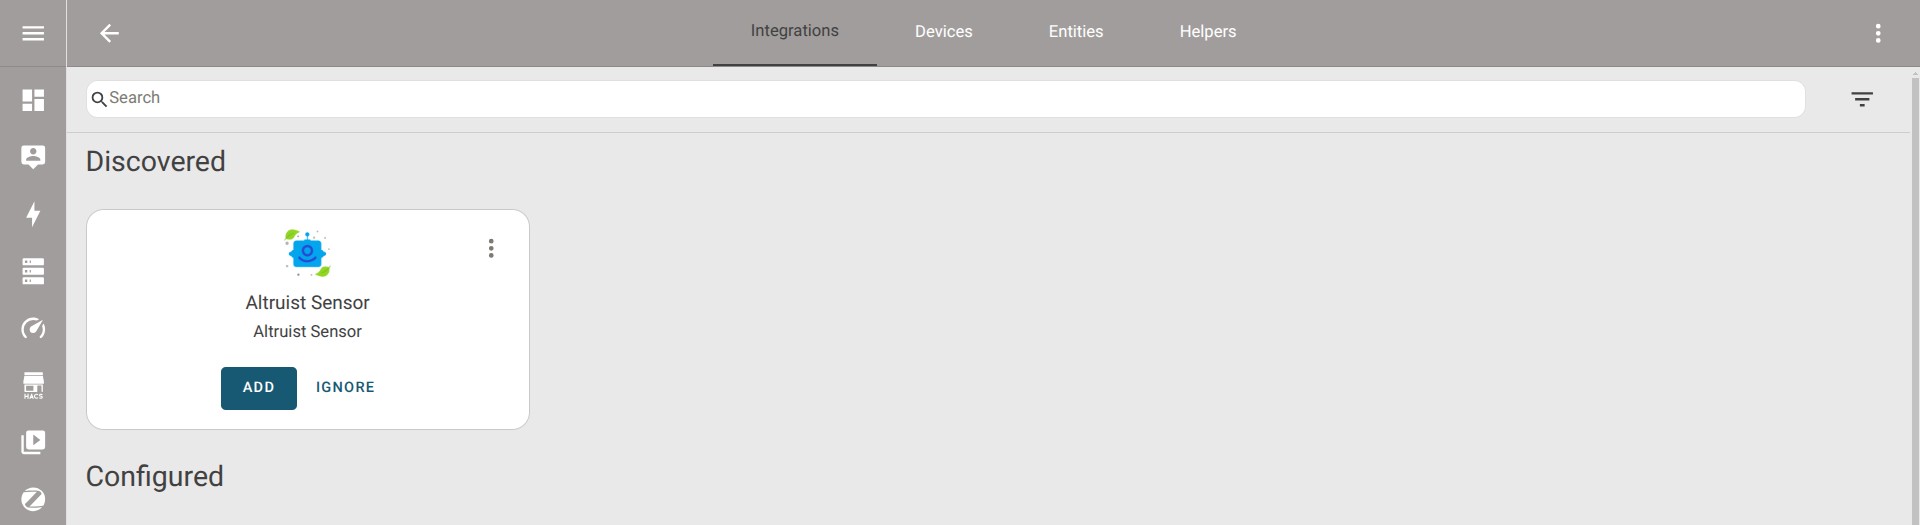
That’s it! 🚀 Your Altruist Sensor is now integrated with Home Assistant.
Couldn't complete
It was hard
It was ok
It was easy
Make a contribution
Robonomics wiki is open source. See something that's wrong or unclear? Submit a pull request.